

HOME
CURRENT
WORK
3.10.2019
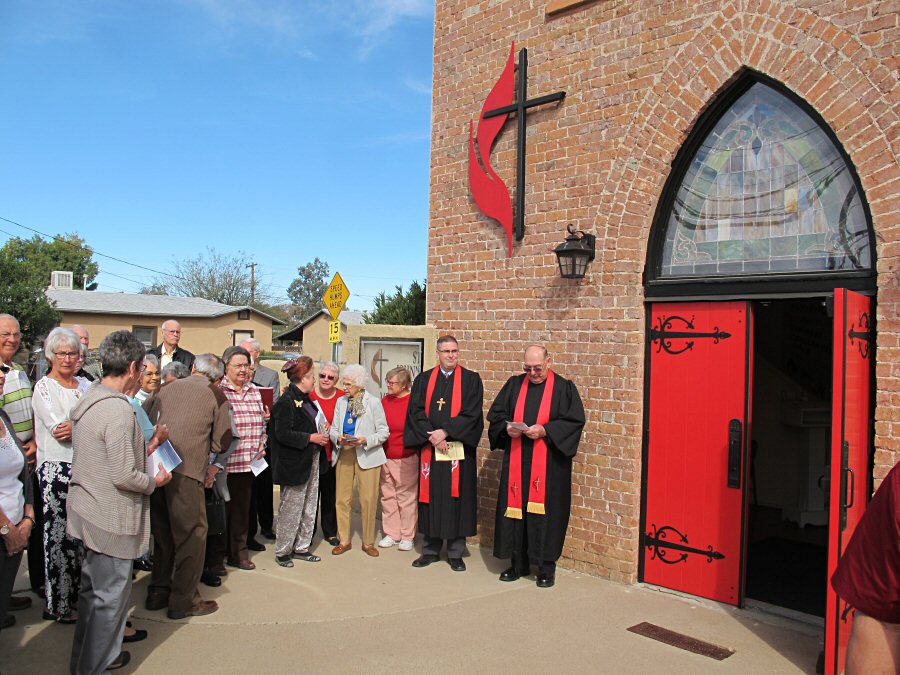
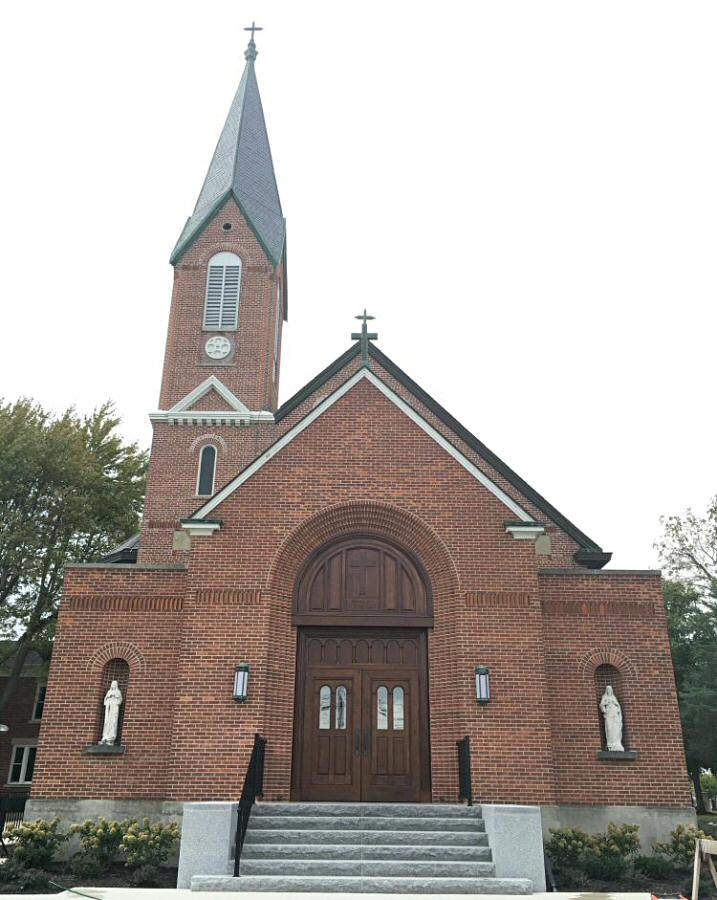
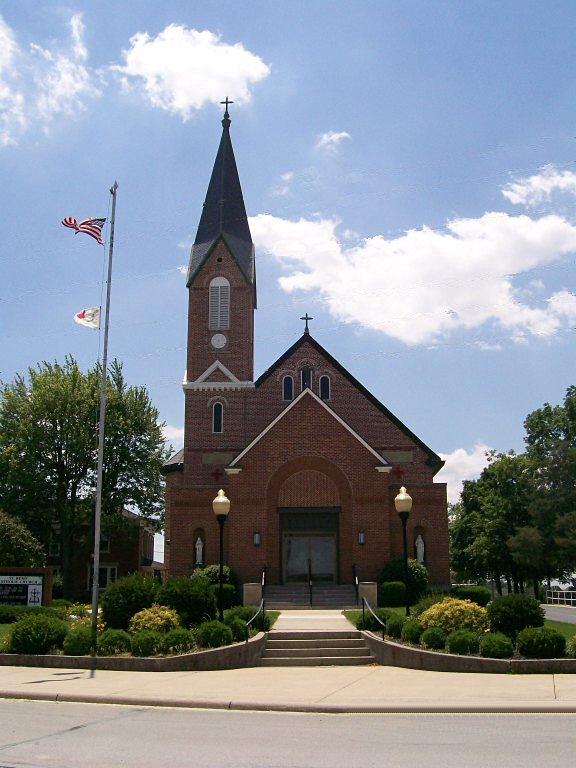
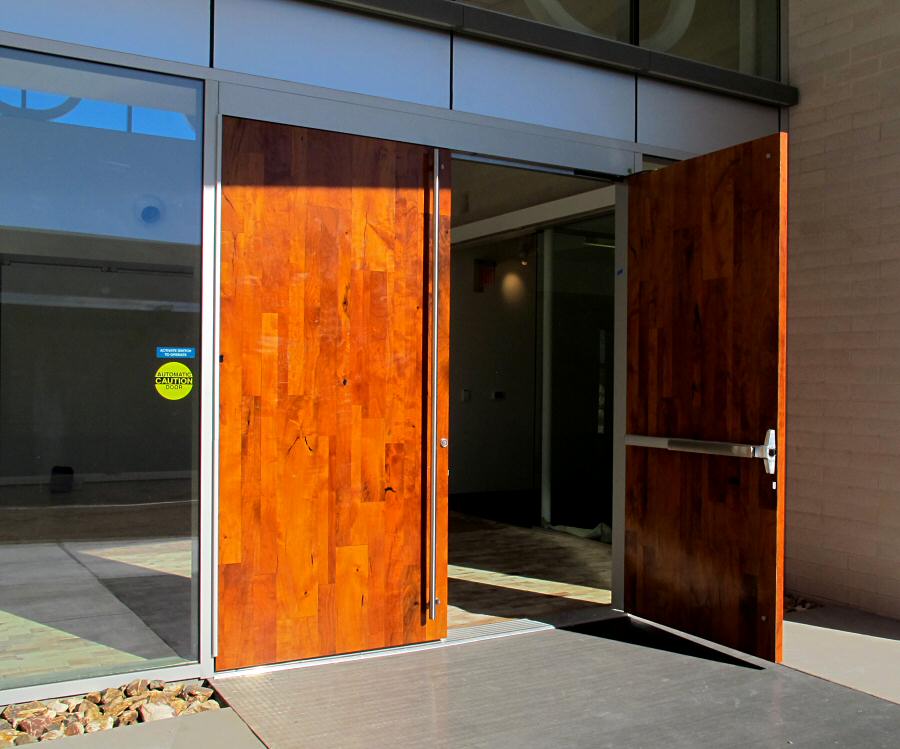
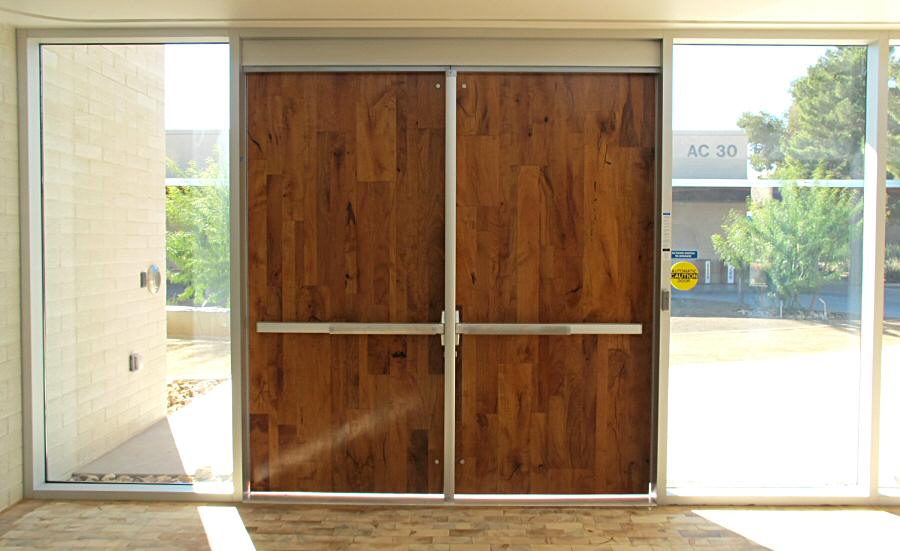
St. John's United Methodist Church in Tucson, Arizona was built in 1931 and sometime in the last 88 years security grills were added to the exterior. I designed new entry doors for the church which greatly improve the appearance and are more secure than the old entry plus the entry is now up to current fire codes for emergency egress. The red and black echo the Methodist Church logo with red being the traditional color for church doors.
The new doors transform the entry from an uninviting fortress to a welcoming place to worship.
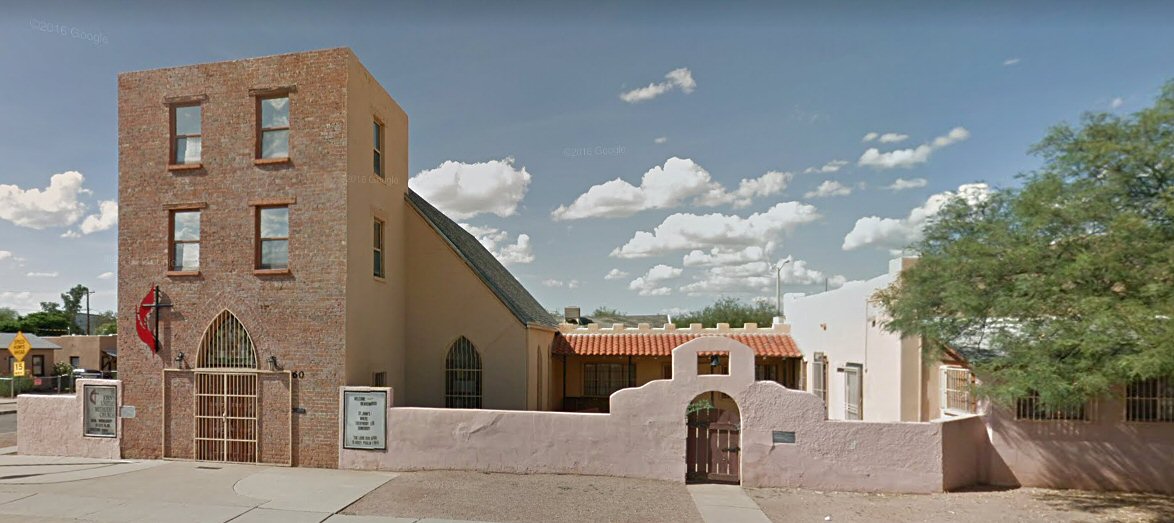
Before photos:

1.1.2019
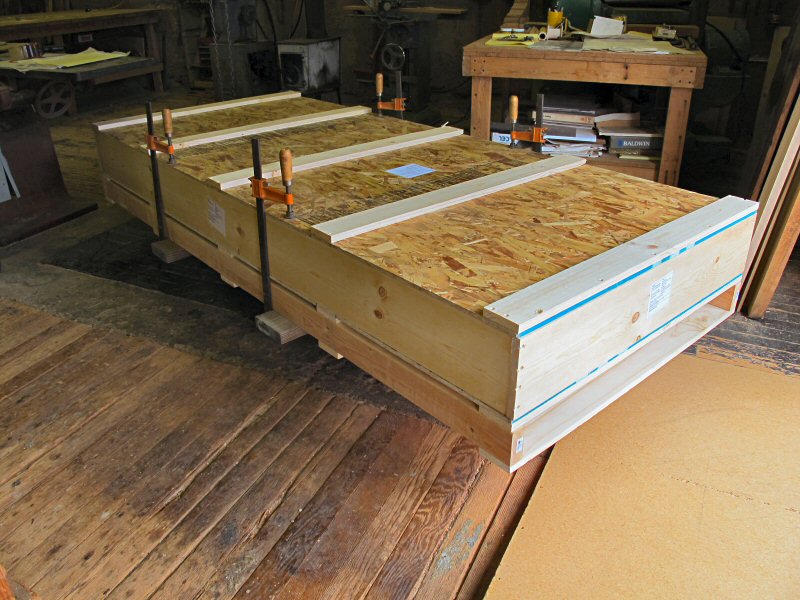
Finishing up a pair of historically accurate entry doors for the Naco Land Port of Entry. The Naco, Arizona Port of Entry has been in existence for more than 100 years. The historic Adobe-style border station built in 1936 still stands and serves as CBP office space. More photos can be seen here.
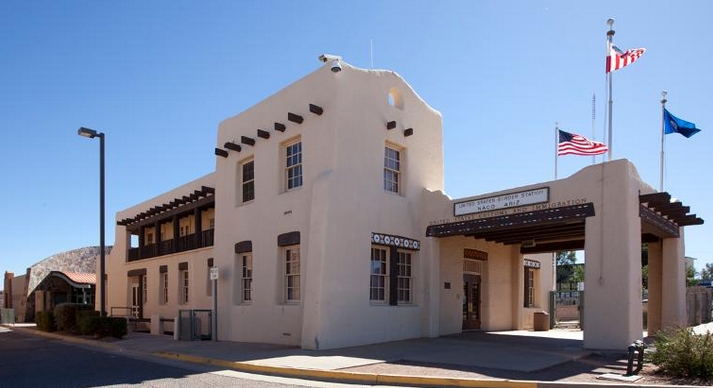
The original architectural drawings were used for the door design and slat colors.

5.21.2018
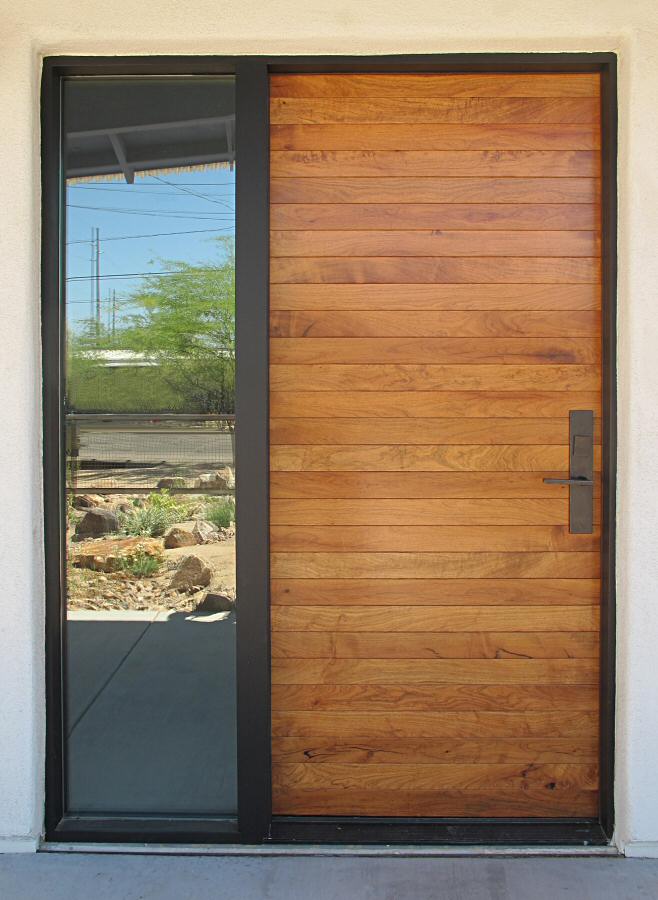
A contemporary mesquite door with horizontal planks. The planks are 1/8" thick and glued to a custom solid core with West brand epoxy. The finished door is very stable and will never warp or crack between the planks because the epoxy is waterproof and saturates each plank. See more photos here.
3.29.2018
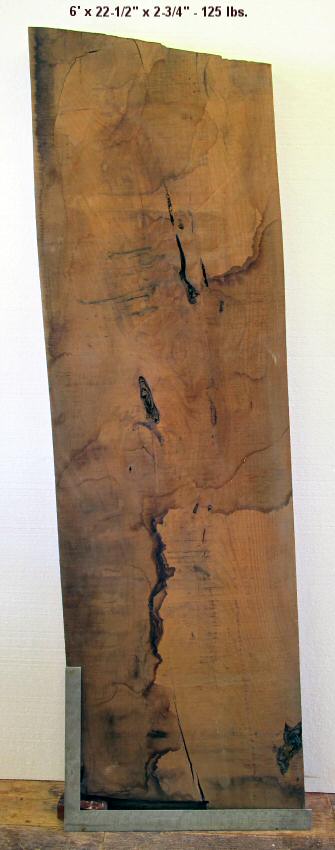
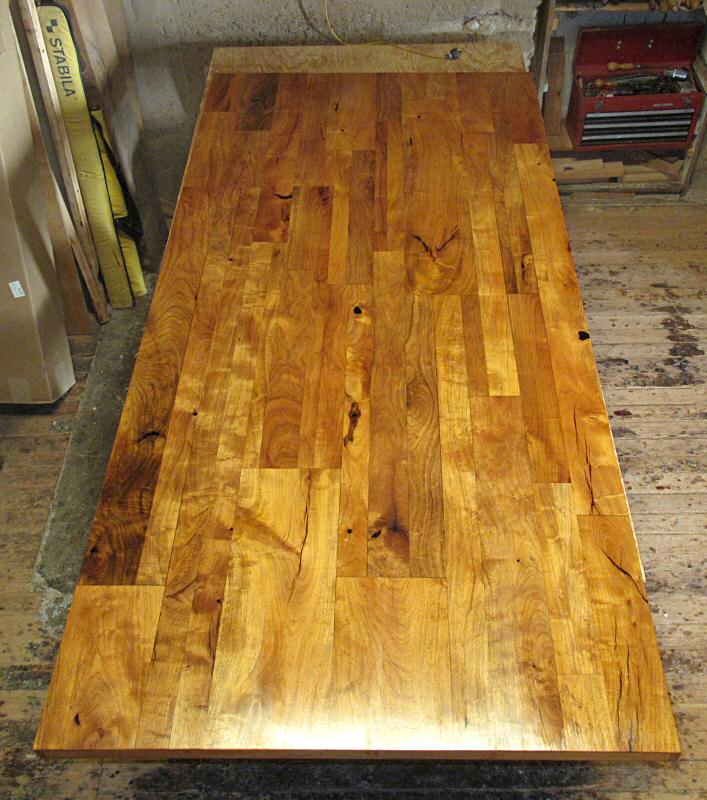
A unique console table made from just 3 planks of mesquite. The table is 10' long x 22" wide x 33" high.
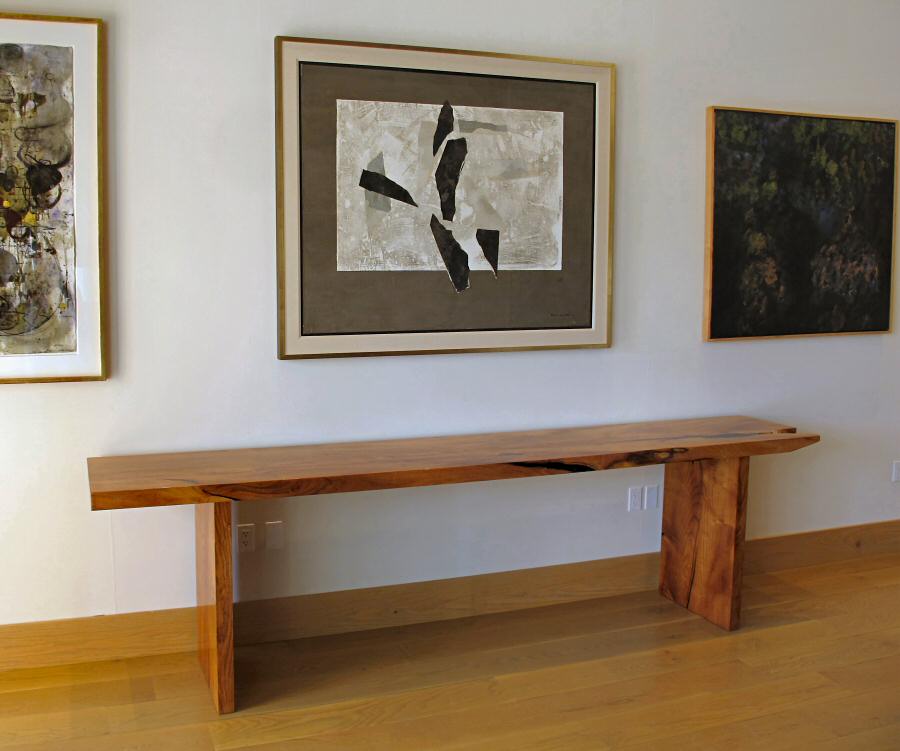
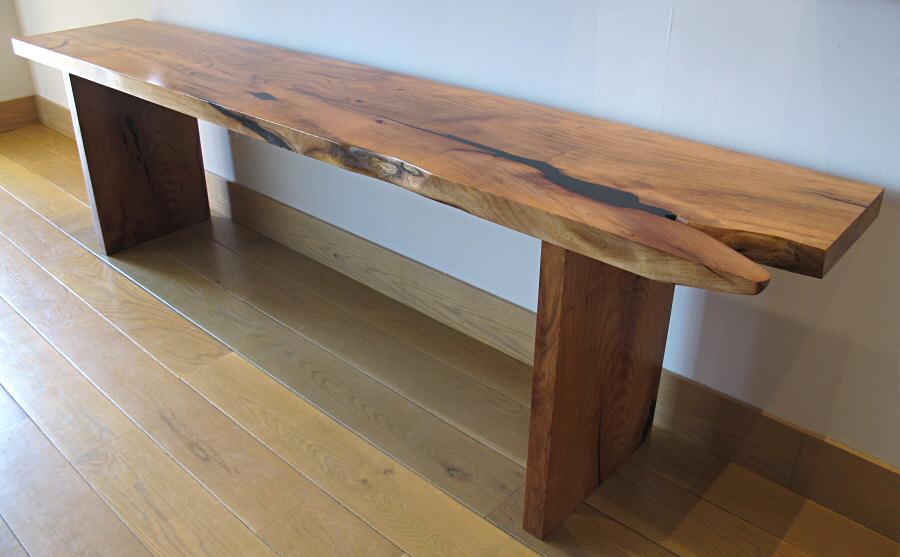
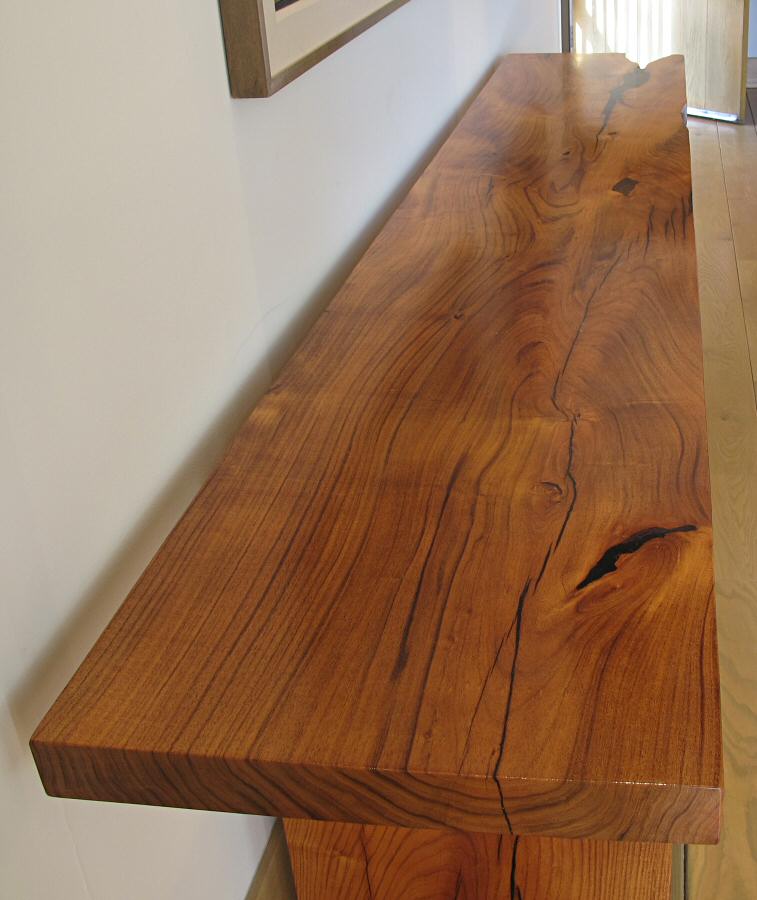
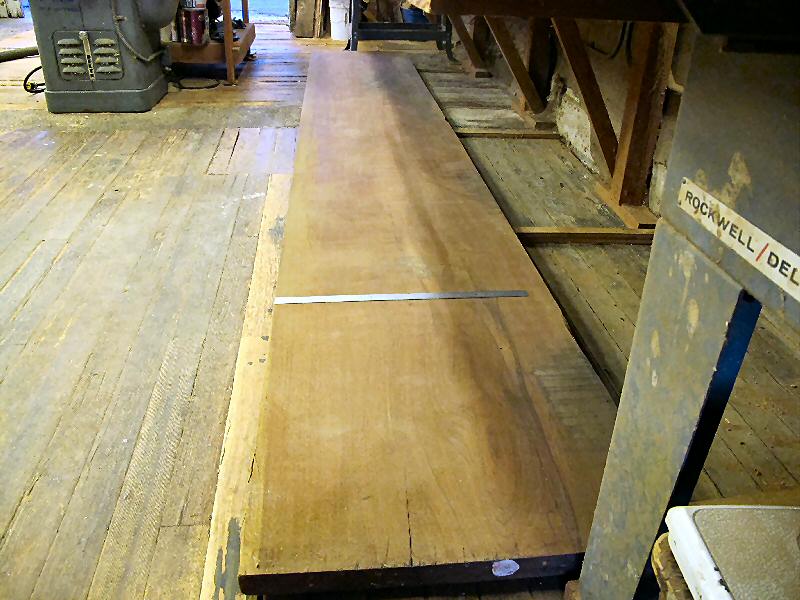
Large mesquite slabs are rare so I buy them whenever they are available. I bought these two slabs 10 years ago, they are 12' long x 24" wide x 3-1/2" thick. One of these planks was made into the 10' long console table above, that means I can make another table if anyone is interested.
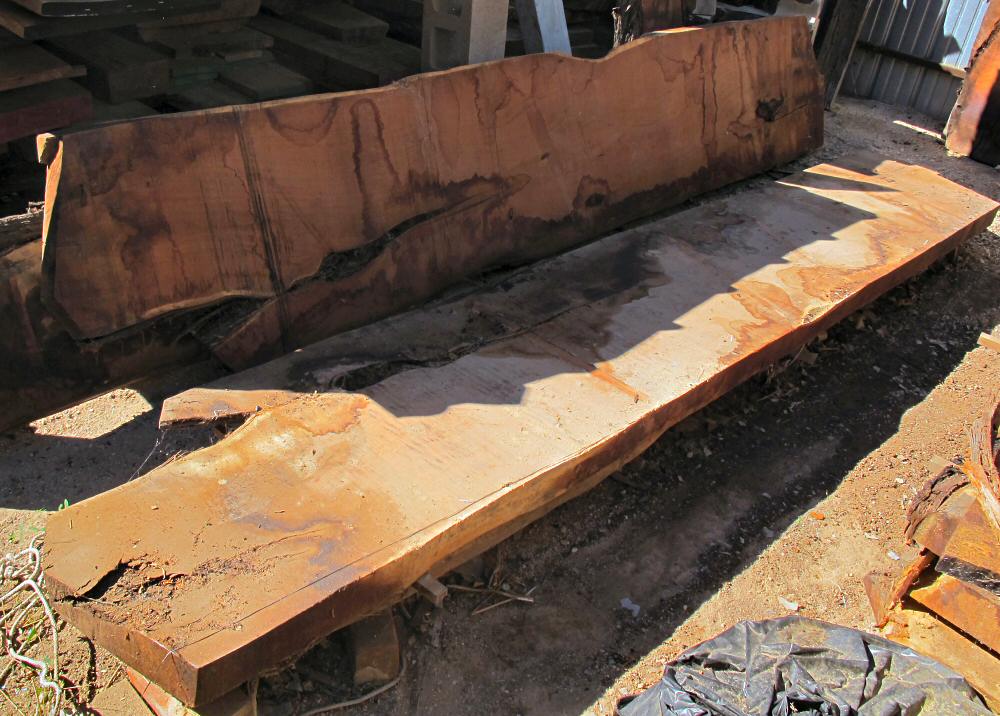
The 2 legs are cut from the 22" wide mesquite slab below:
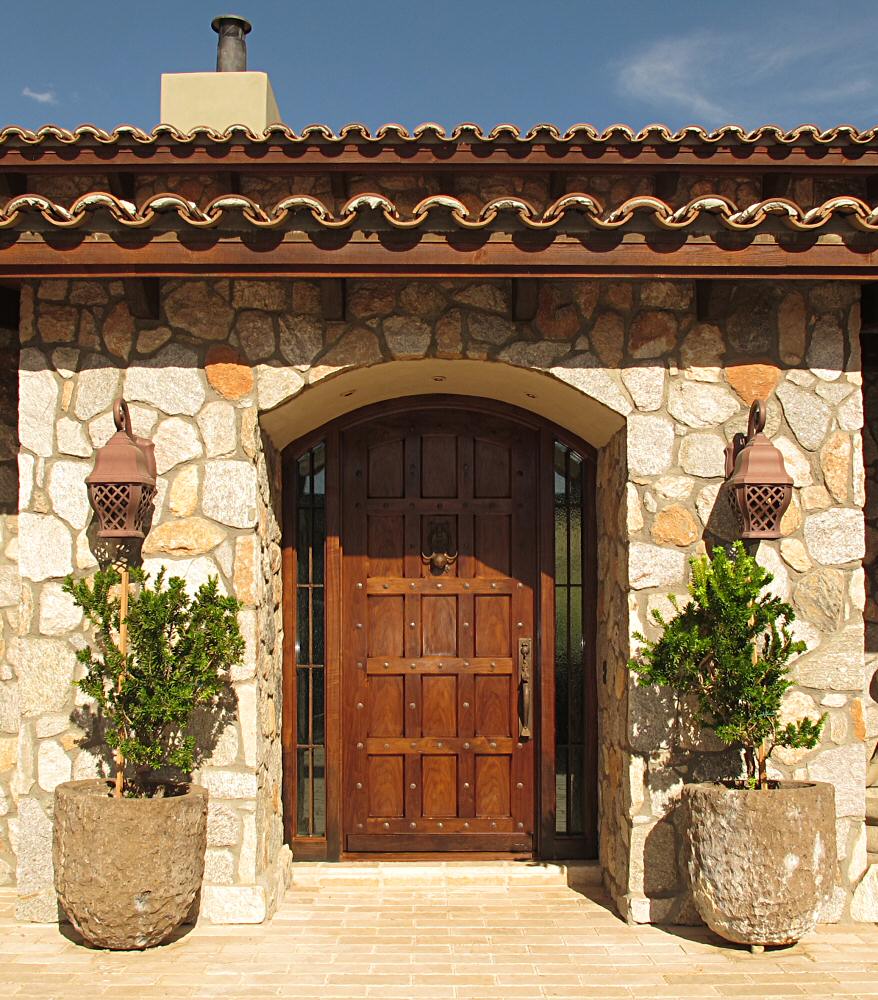
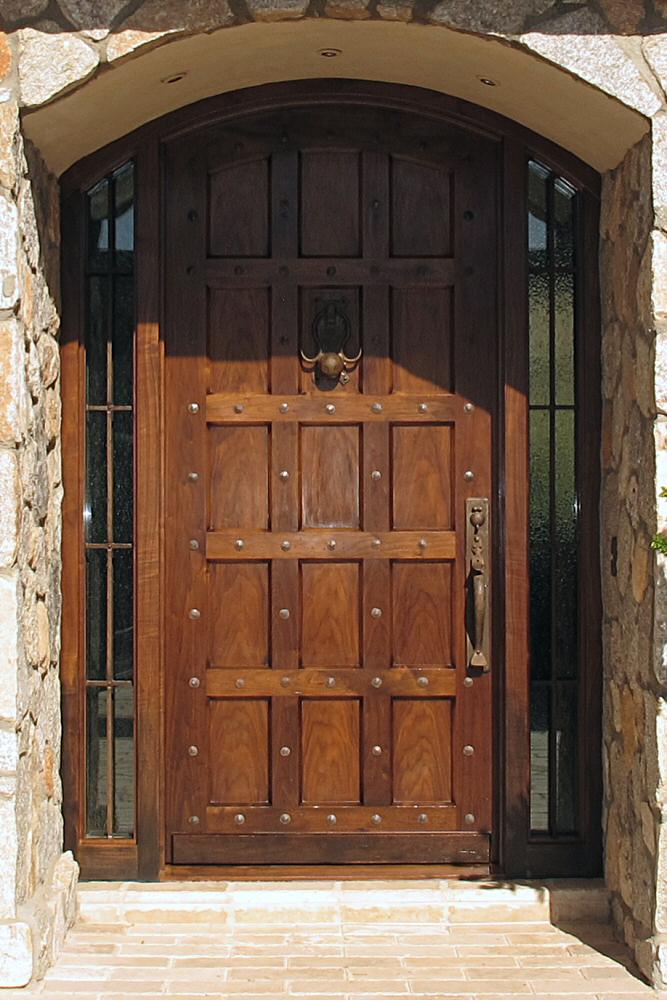
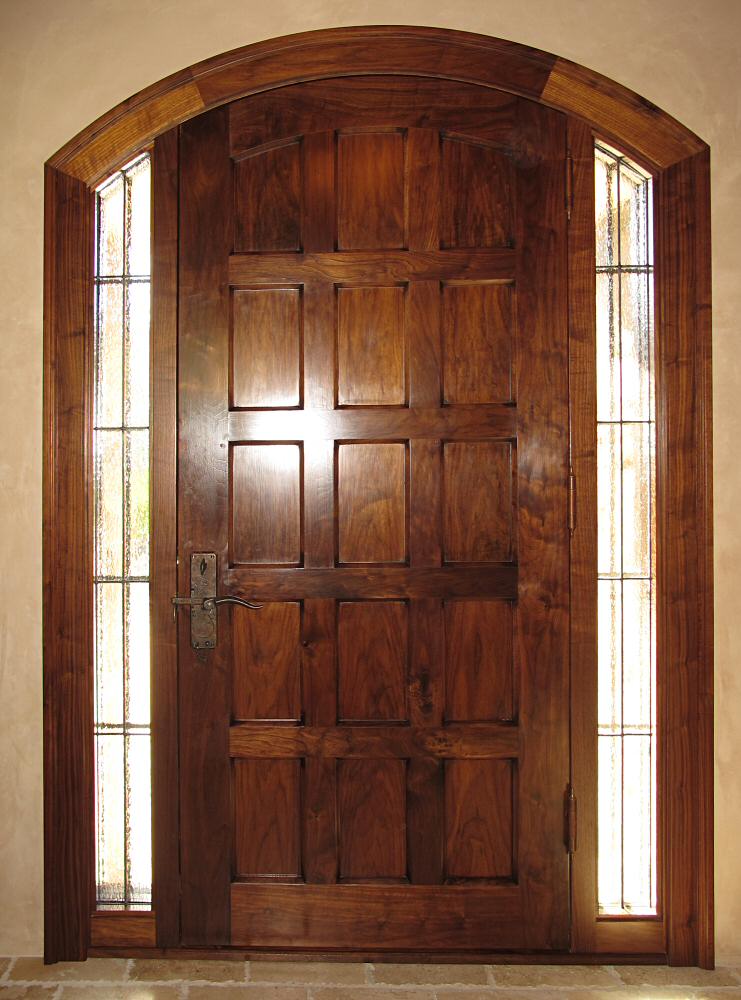
10.22.17
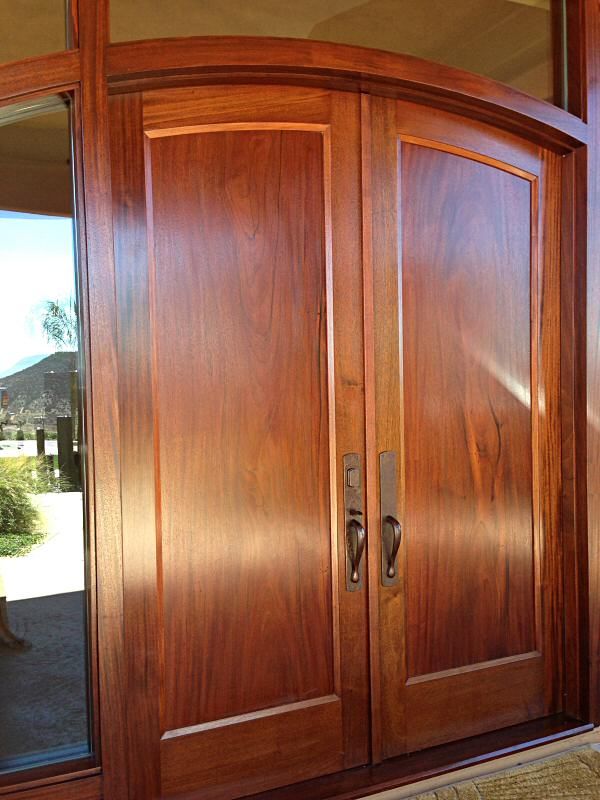
The antique Italian entry is completed. The walnut door is 2-1/2" thick. The sidelites include antique Italian leaded glass, 1" Solarban 60 insulated glass and custom hand forged wrought iron grills. The entry is also slightly distressed and aged.
8.21.17
My current project is a replica of an antique Italian church door, a great summer project with lots of parts.
The door is constructed using the same type of mortise and tenon joinery traditionally used for hundreds of years.
The first dry fit assembly - perfect!
The 45 degree bevels and panel grooves are cut in, the 'ears' on the top and bottom get cut off later
Arched jamb and casing
Next up: veneered walnut panels
6.26.2017
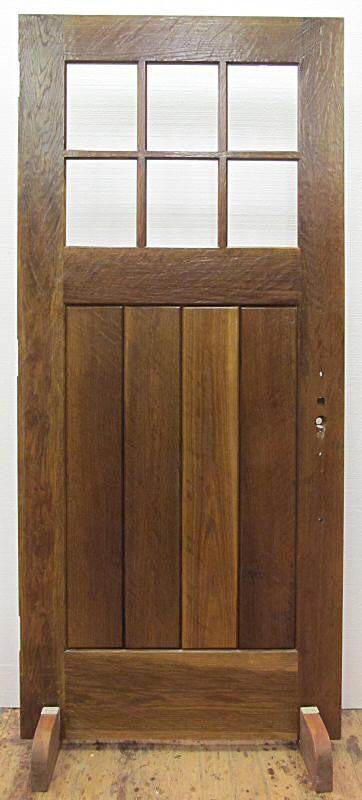
I built this pair of french doors to match the existing doors in a house built in the 1930's, custom restoration work - no problem.

3.7.2017
The contemporary entry is close to completion. The natural walnut planks are surrounded by a dark stained frame and jamb for a interesting contrast. My doors are finished while flat on the bench, 4 full coats of McCloskey Man O' War Satin Spar Varnish carefully brushed on.
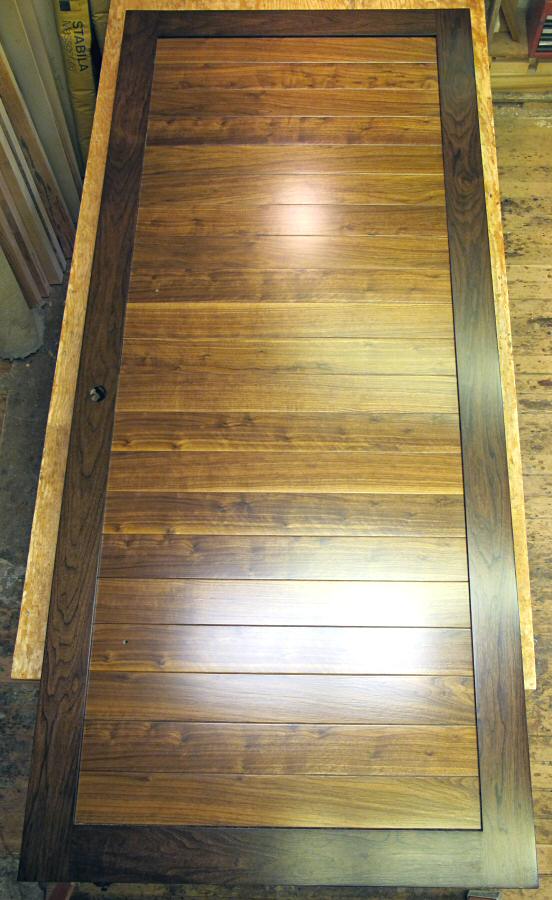
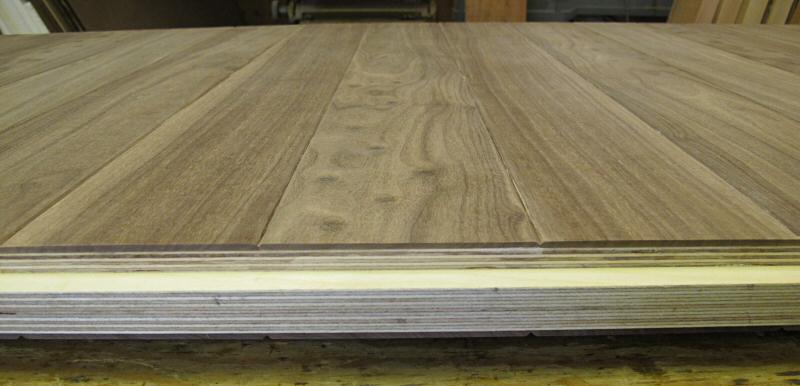
The horizontal planks are actually shop made 1/8" walnut veneer applied to a 1-1/2" thick plywood core with West epoxy. The resulting panel is a lot more stable than solid wood and will never crack, shrink or warp like solid wood.
12.9.2016
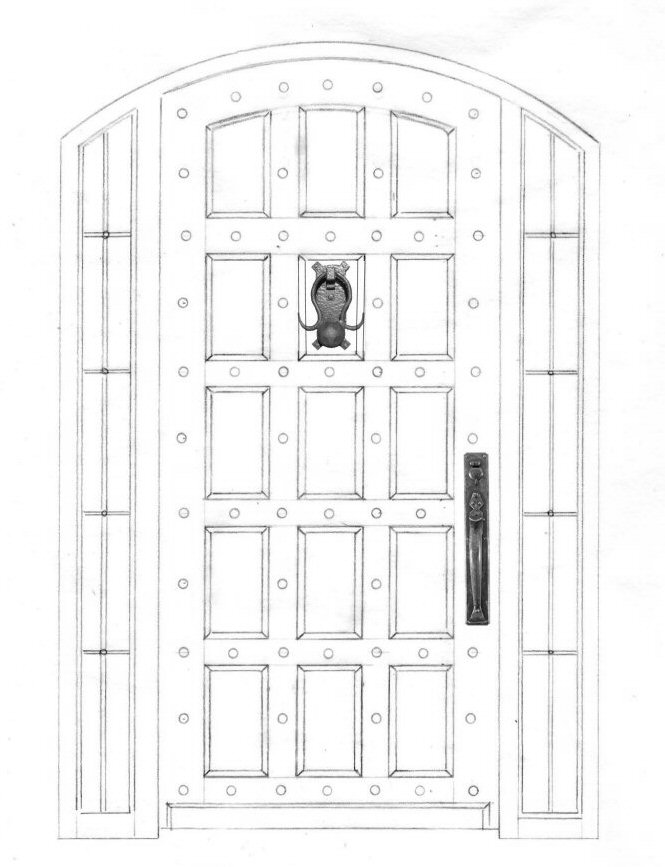
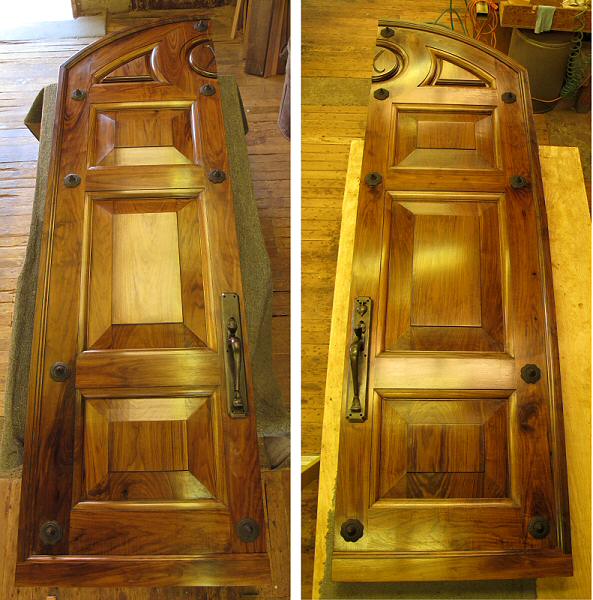
I'll be working on two amazing entries in 2017, both entries will be made from walnut. The arched door is based on an old Italian church design, large and heavy, the door will be 40" wide, 96" high and 2-1/2" thick. The design includes handmade clavos, custom hand forged wrought iron, and clear leaded antique glass.
The second winter project is a contemporary style door with horizontal v-groove planks. The planks will be the natural walnut color and the surrounding frame and jamb will be a dark stained walnut.

12.9.2016
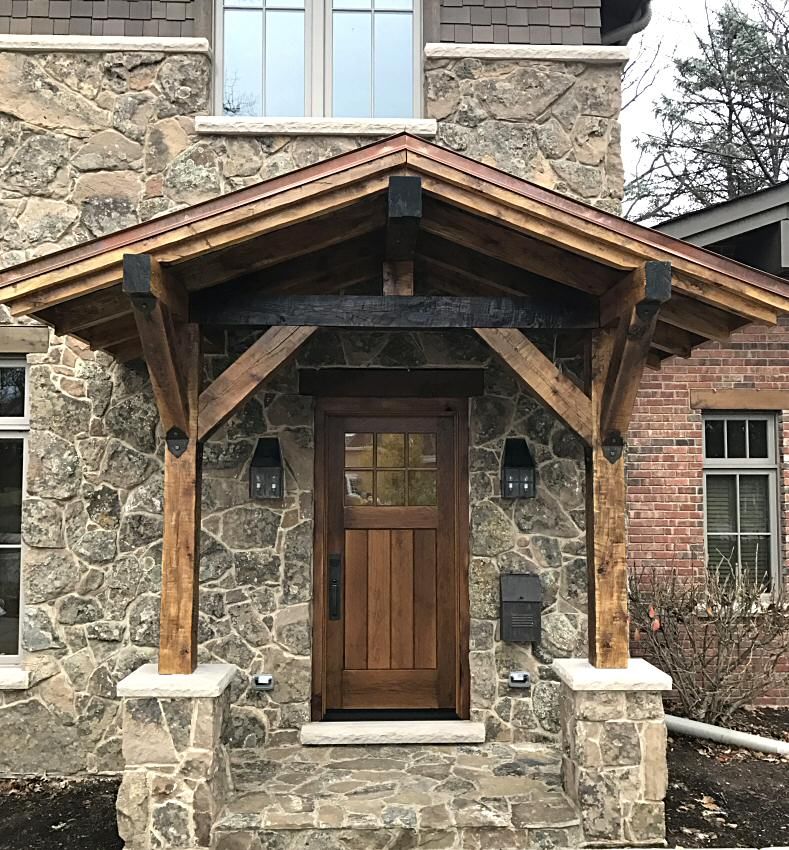
I recently received finish photos of the hand planed white oak door I shipped to Glen Ellyn, Illinois. The door looks great alongside the rustic porch and stone work.
7.28.2016
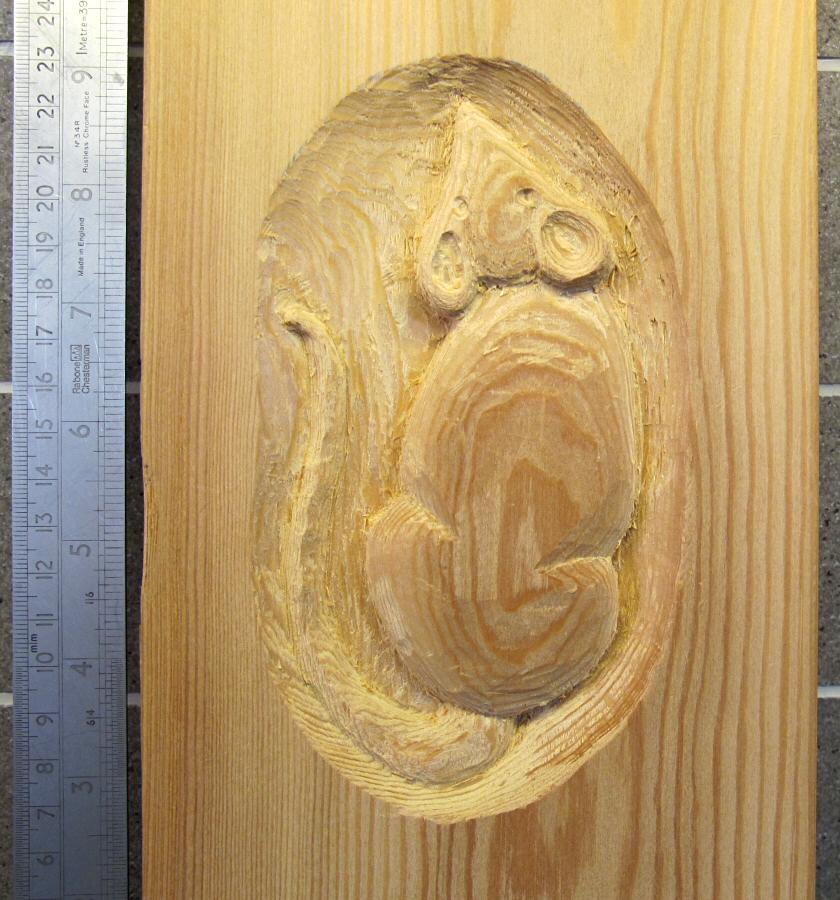
I have an arched rustic door in progress, the customer asked for a mouse carving for a whimsical touch. Here is the sample mouse I carved.
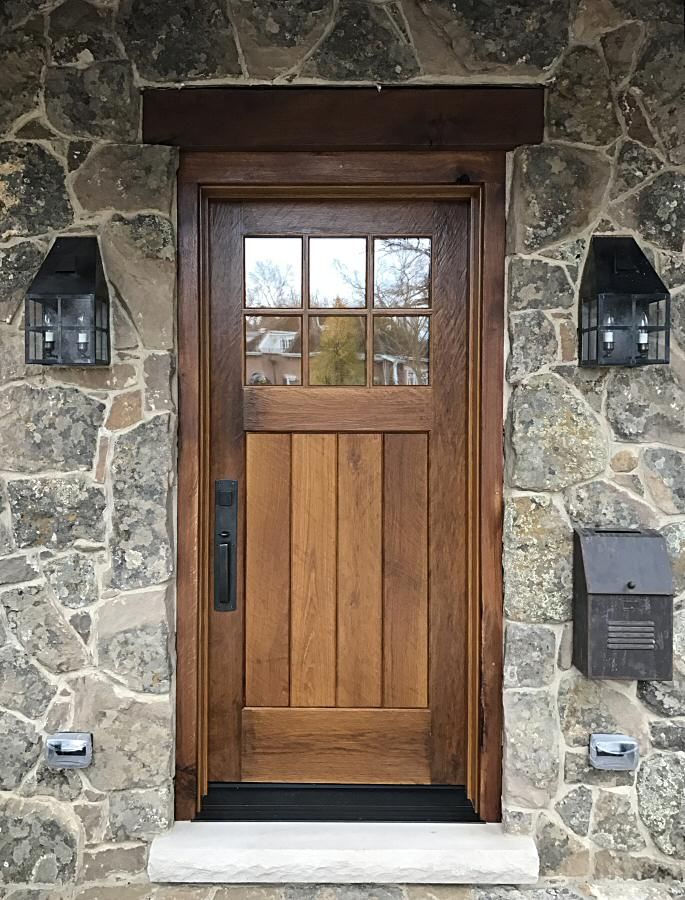
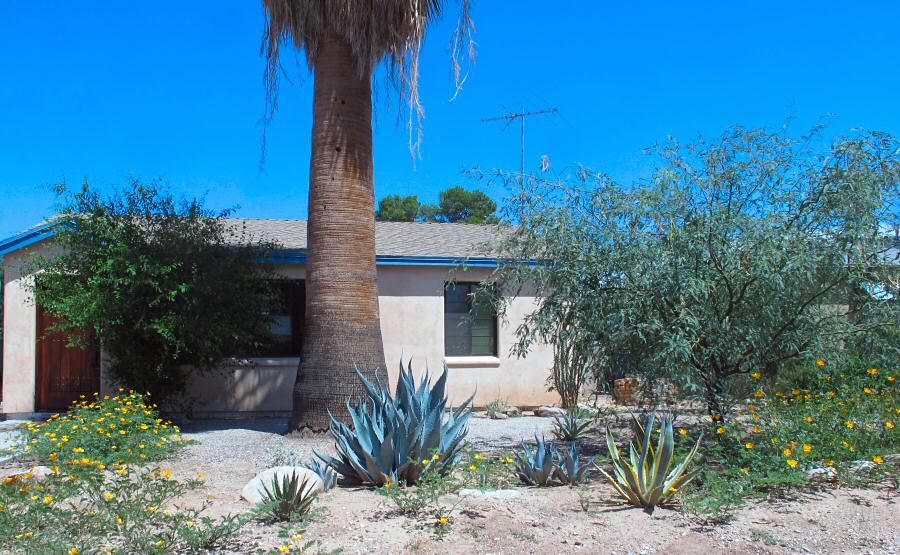
6.9.2016
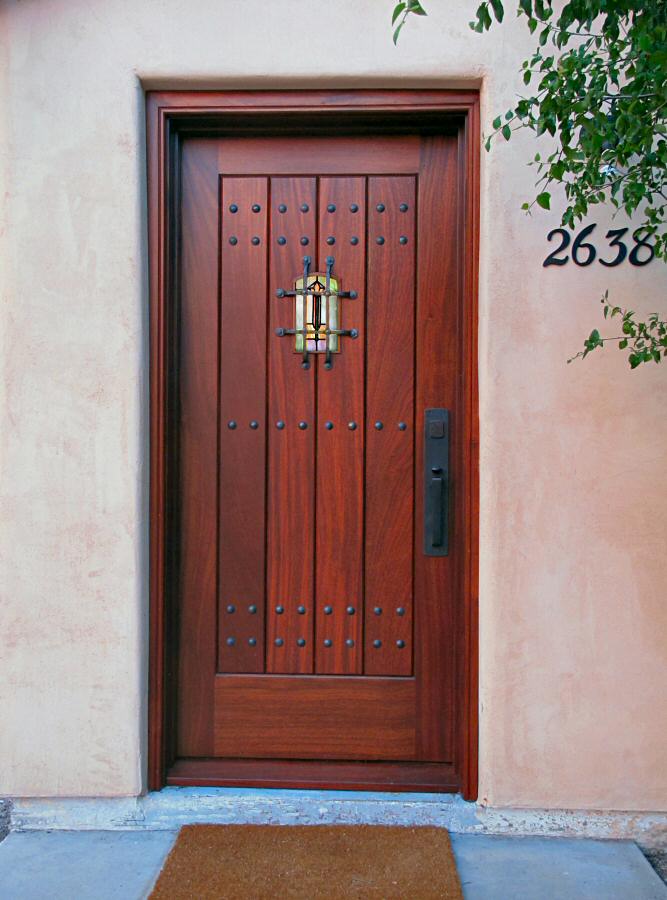
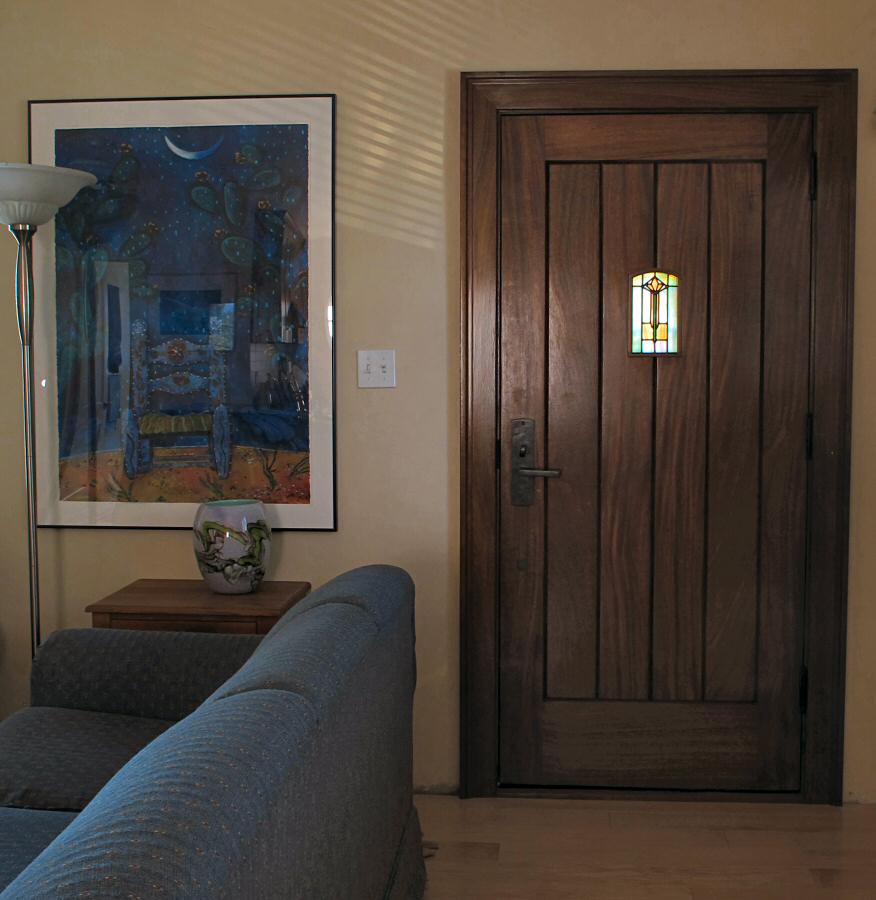
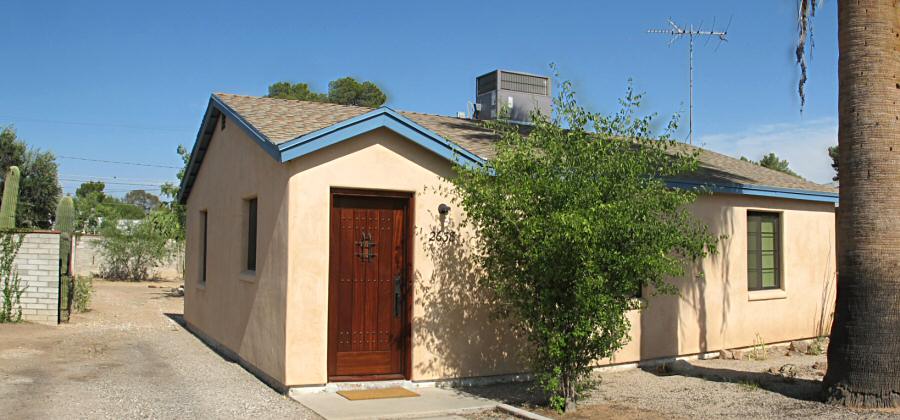
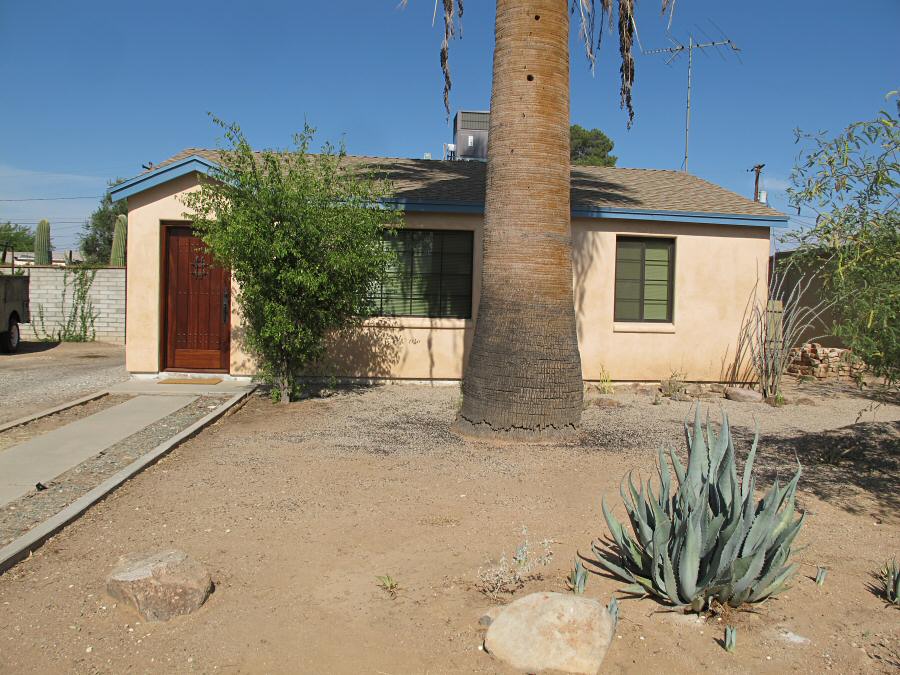
A new front door can literally transform the front of a house. This little 2 bedroom post-war house was built in 1950 and needed a bit of sprucing up.
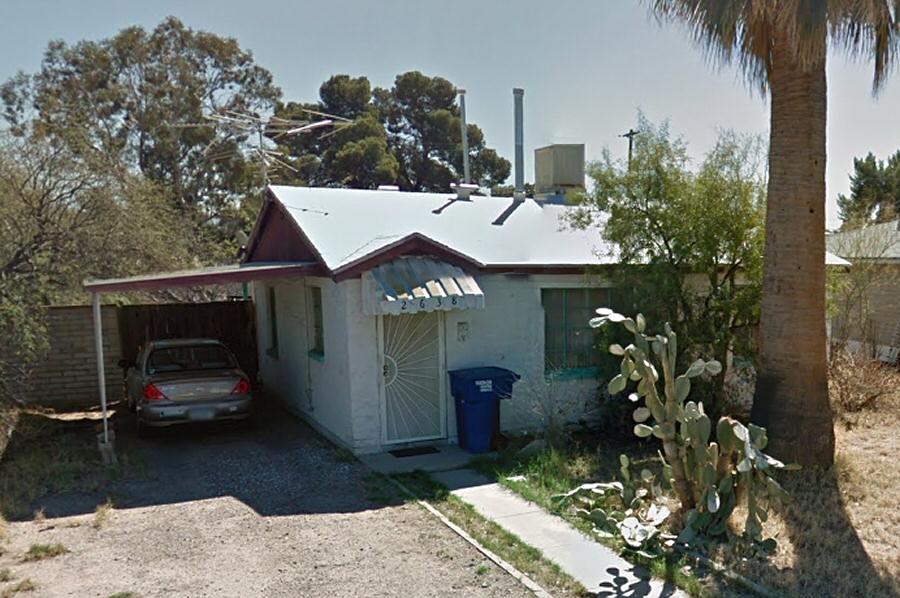
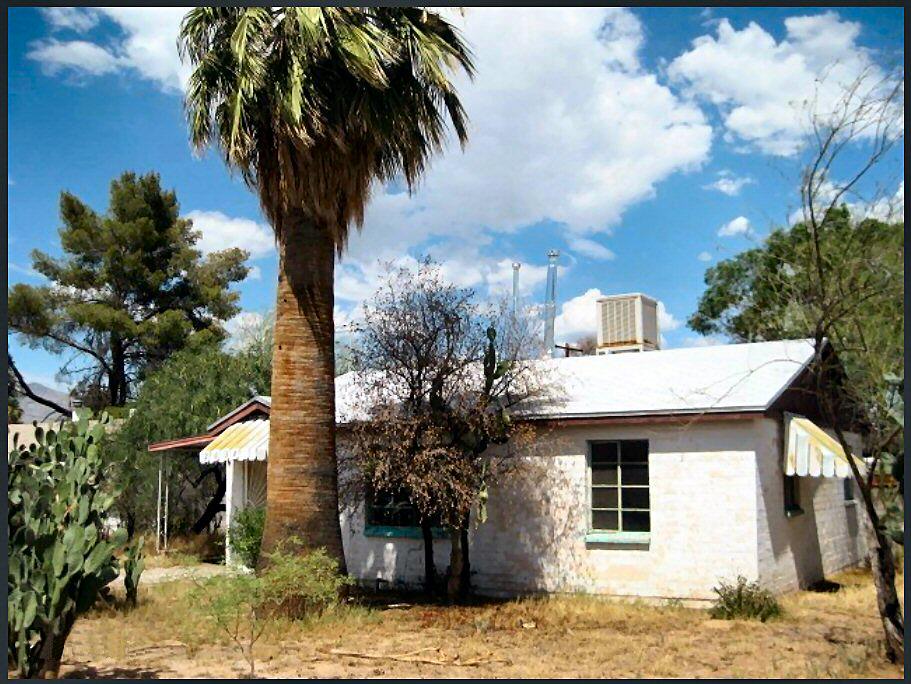
The yard was cleaned up, awnings removed, Marvin Integrity fiberglass windows with Low E3 insulated glass replaced the original steel casement windows, a new roof with R40 insulation, high efficiency A/C, and a marble dust plaster over 1" rigid insulation resulted in a very energy efficient comfortable house.
The new Arts and Crafts style mahogany door ties all the exterior elements together and turns the house into a home. The door includes 40 bronze rivets, a hand forged wrought iron grill and custom stained glass. The entry handle is by Ashley Norton Hardware.
2.1.2016
The
new mesquite entry door for the Life in Balance Spa building at Miraval
Resort and Spa in Tucson, AZ.
Click on photo to see more photos.

1.6.2016
Finished photo of a just completed hand planed white oak entry door with fumed ammonia finish. The door will be crated and shipped to Glen Ellyn, Illinois.

Ready for pickup
9.30.2015
In April 2014 the St. Remy Catholic Church in Russia, Ohio commissioned me to update their main entrance. A year into the design and construction I have a couple of months until completion. The job entails new entry doors, a new jamb, the 7 arch transom, lintel, 6" wide molding and arched tympanum, all in American walnut. Click here to see more photos.
Completed
entry
Before
1.6.2015
The Mesa Community College Art Gallery mesquite entry doors make a dramatic statement installed in the art gallery's modern/industrial design.
9.2.2014
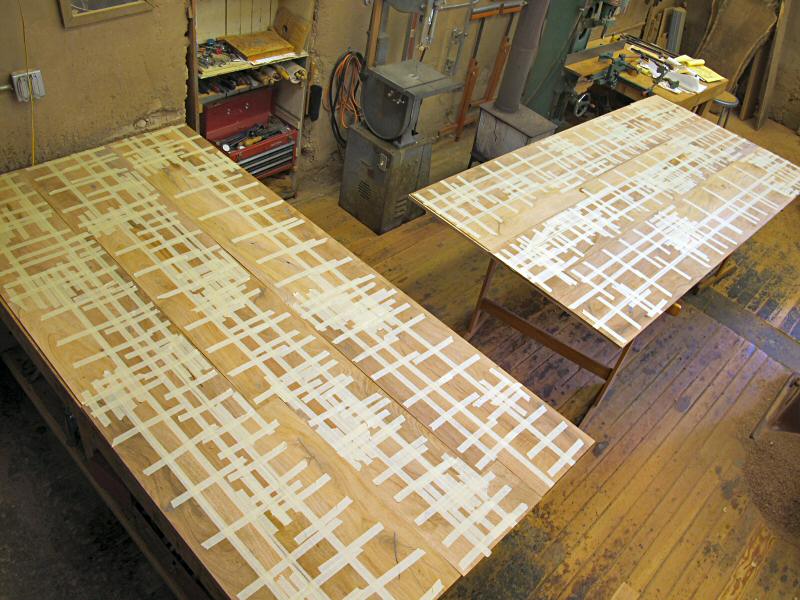
Custom mesquite veneer doors for the new Mesa Community College Art Gallery, each door of the double doors are close to 4' wide by 8' high. The random veneer concept is by DWL Architects.
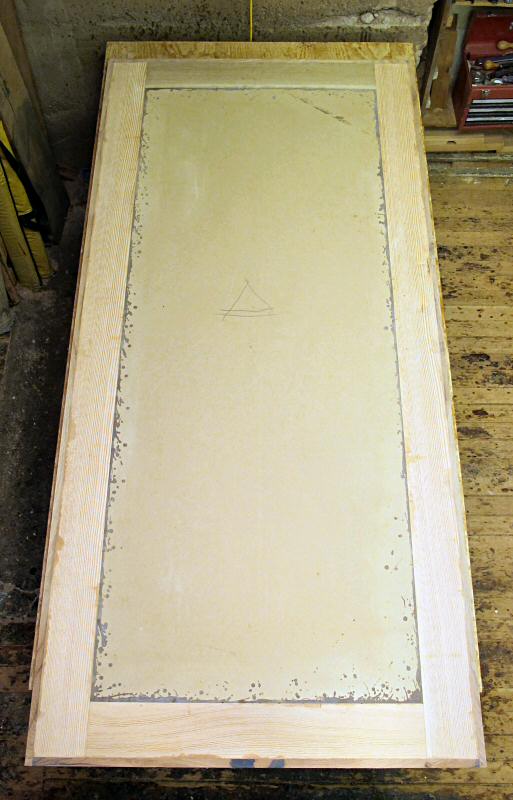
The custom core for the oversize doors consists of a center panel of 3 layers of 1/2" MDF glued together with epoxy in a vacuum bag veneer press. A mortise and tenoned vertical grain fir frame surrounds the MDF panel which adds structural stability and plenty of support for hinges, door pulls, door closers, and exit devices.The core is edge banded in solid mesquite and the veneer panels are also applied with epoxy in the veneer press.
The 200 individual veneer panels are 3/16" thick. Black epoxy is poured into the cracks and sanded smooth before final glue-up.
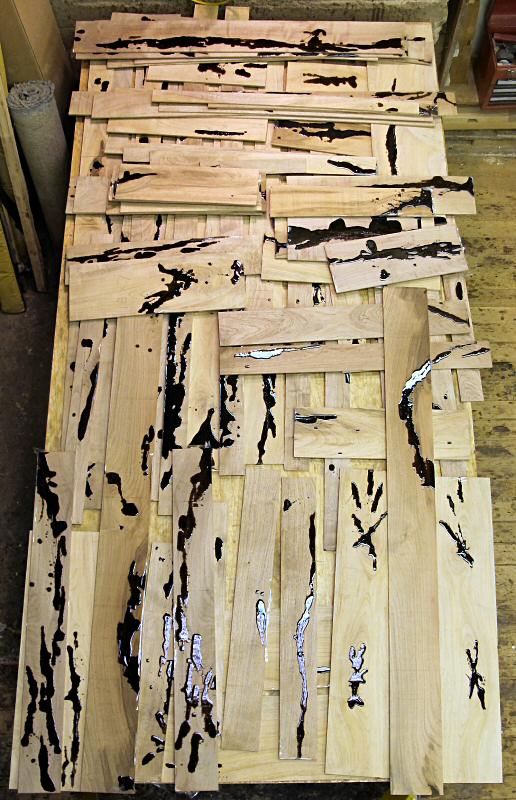
The veneer sheets for the 4 sides are held together with masking tape and epoxy.
The mortise and tendoned frame and MDF core before assembly
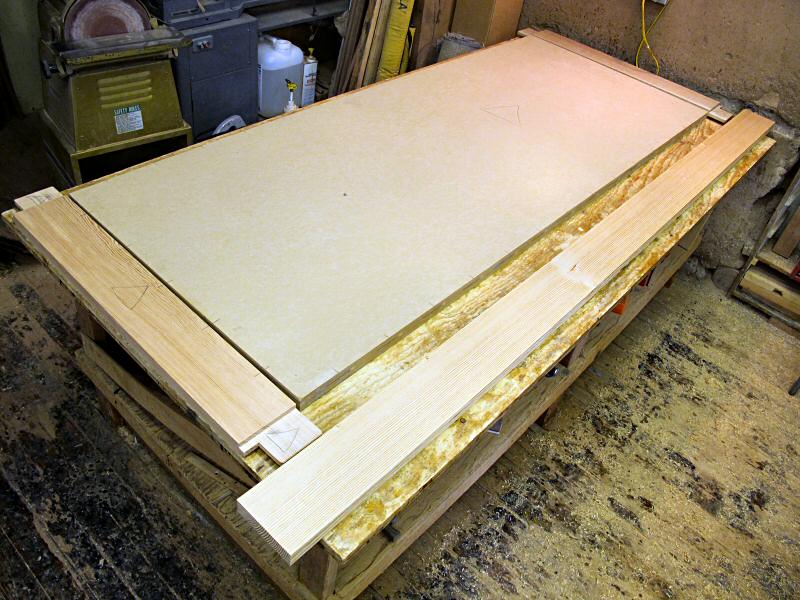
The assembled edge banded core ready for mesquite veneer
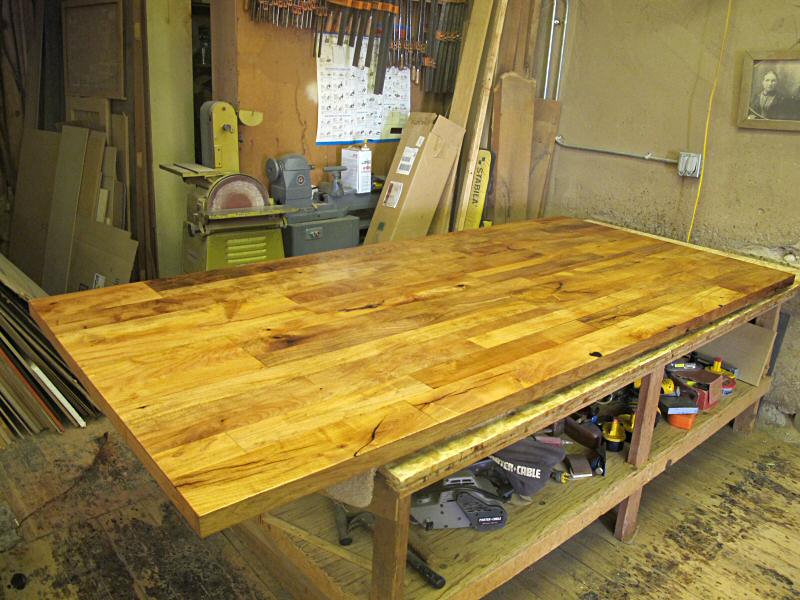
The finished doors ready for delivery

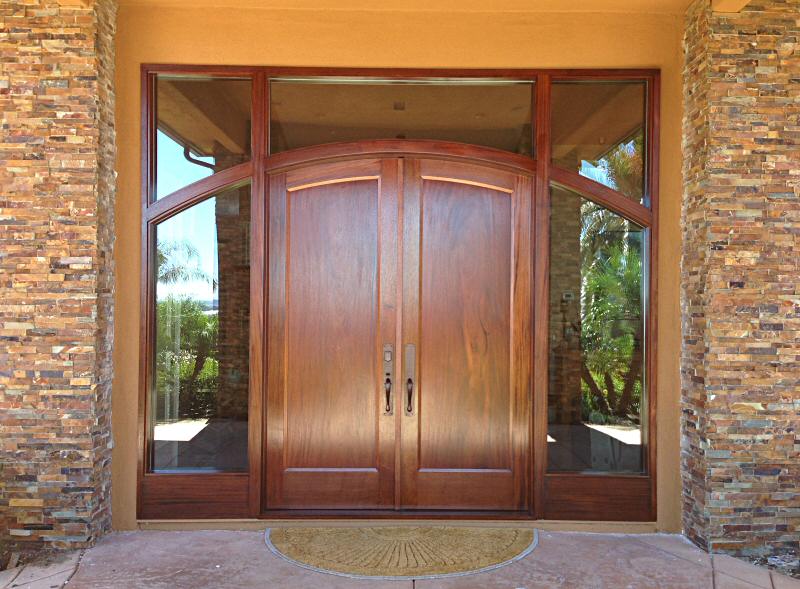
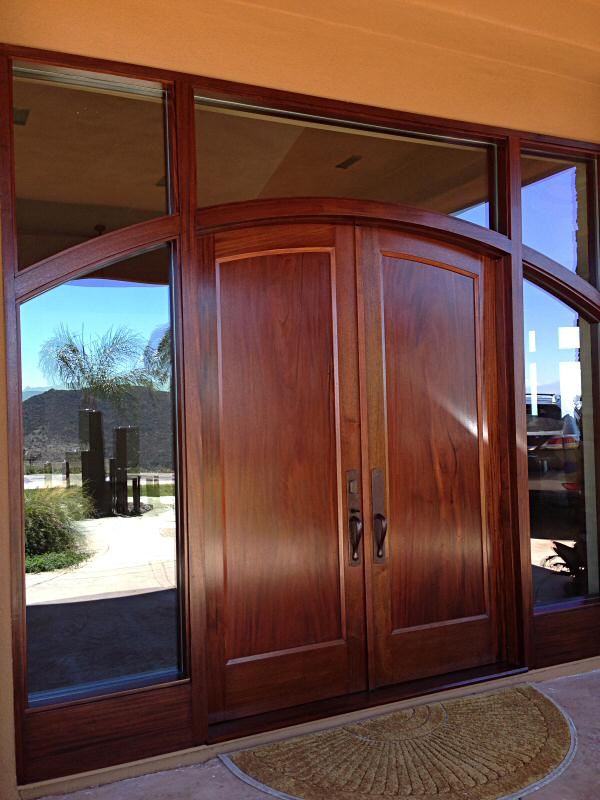
A customer in the San Diego area decided to update the existing entry of their house, they picked a design from my portfolio and I modified it to fit the new opening.
The plan was to remove all the windows along with the surrounding framework to make one large opening for my door with sidelites. Below is the before photo. The house looks great but the existing entry is dated.
We decided on mahogany because I had one 26" wide plank of authentic Honduras mahogany I saved for over 20 years. The plank was just wide and long enough to get the two panels I needed for the doors.
The jamb unit is assembled in my shop then taken apart for shipping. The two sidelites, arched top header and jamb top interlock using mortise and tenon joinery.
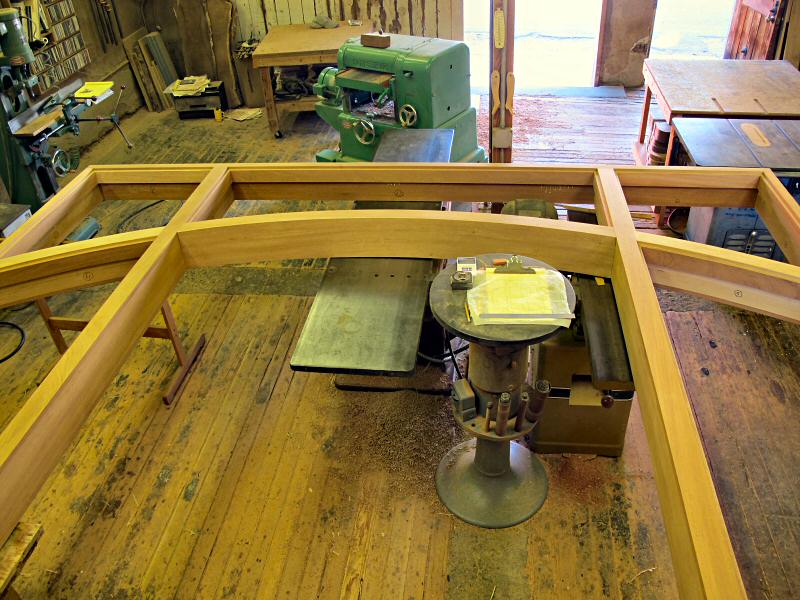
Each door is dry fit together before glue-up. I pre-finish the panel and seal the top and bottom end grain with epoxy to minimize movement due to moisture.

The finished jamb is re-assembled on site
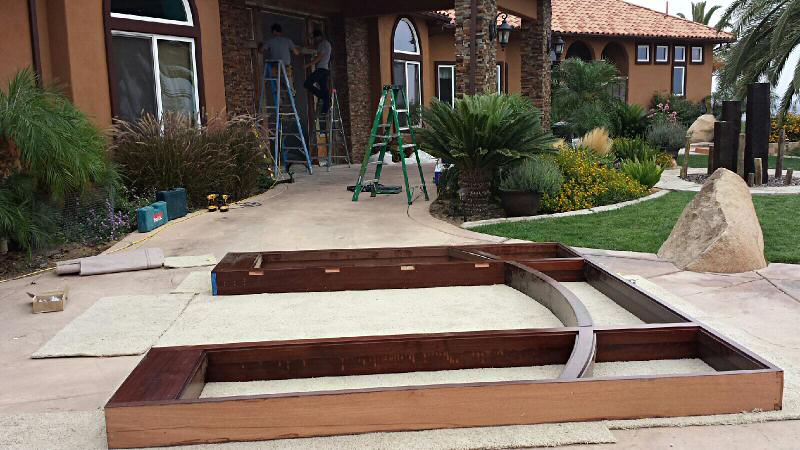
The completed entry transforms the entry into a dramatic and welcoming entrance. The Honduras mahogany color is natural without any stain.
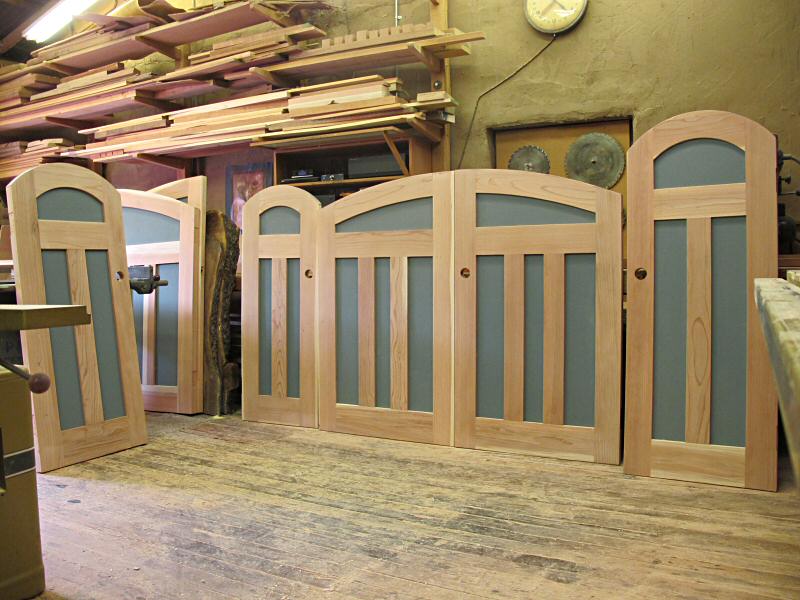
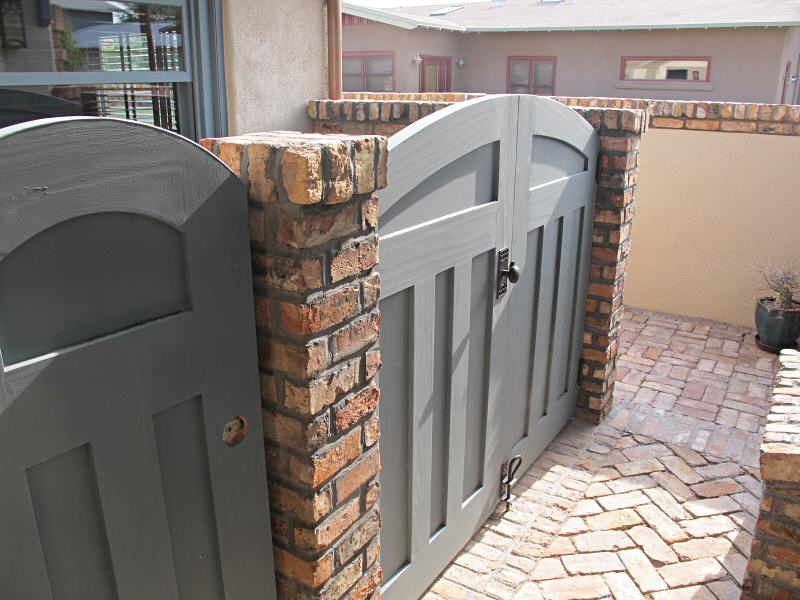
8.20.2013
Finishing up a run of 12 arched top Craftsman style gates. The top and bottom of the redwood gates are sealed with West epoxy before painting to waterproof the end grain and eliminate any future water damage.
3.13.2013
The two walnut doors are going to Texas, here they are waiting for their ride.
A glued up door upright for the first time and ready for final finishing.
Gluing up large doors can be tricky and sometimes it doesn't happen all at once. I glued up the bottom section first and the complicated top section the next day.
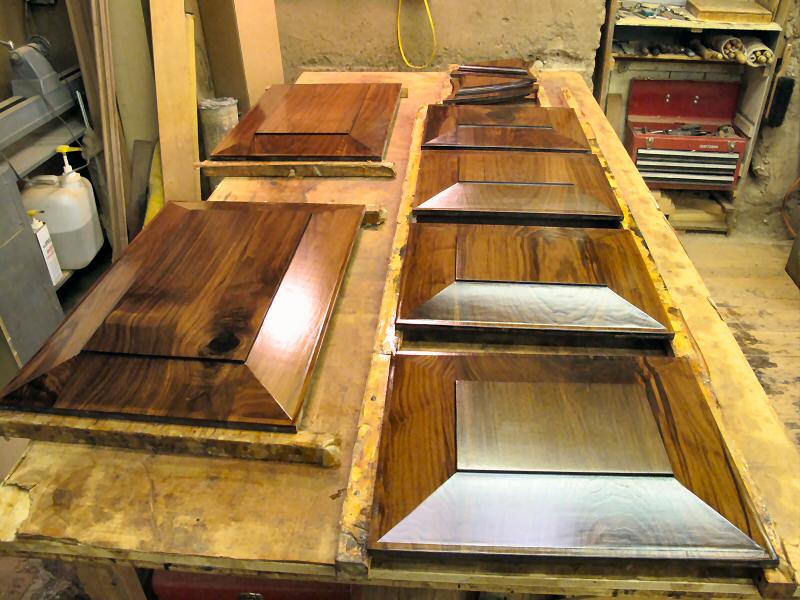
The raised panels are always pre-finished before assemble, that way all the edges are sealed too.
12.16.2012
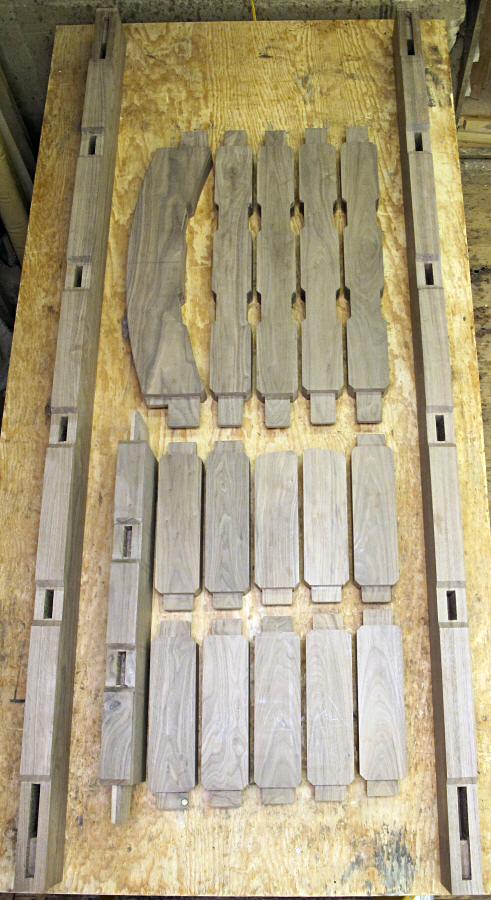
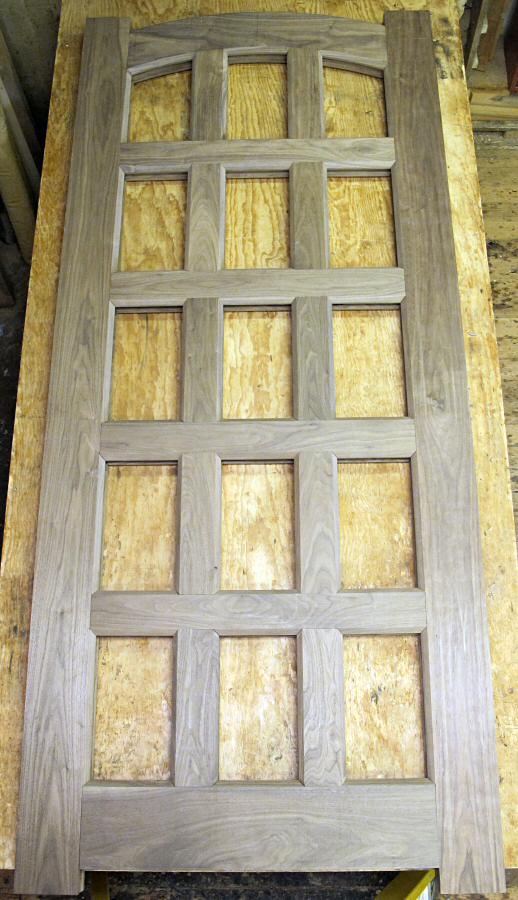
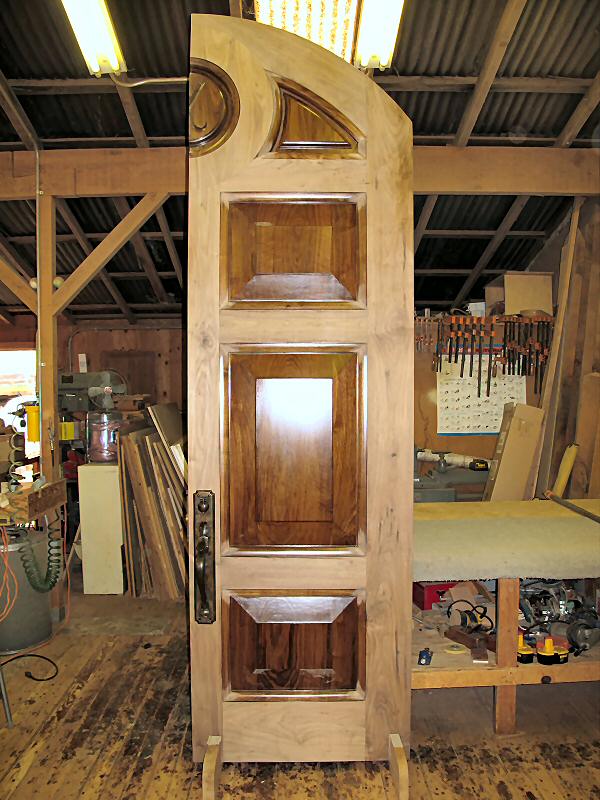
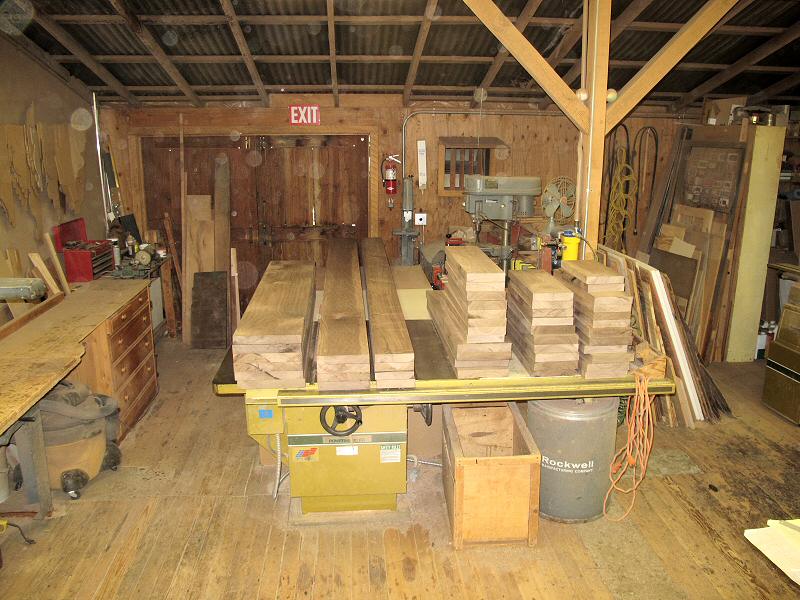
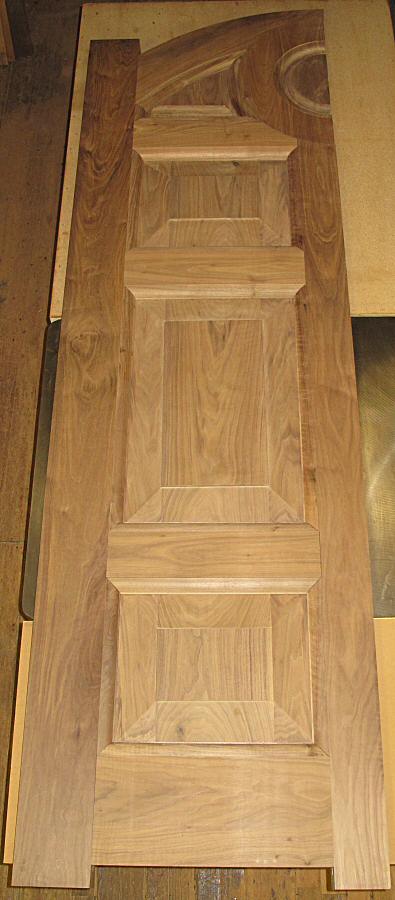
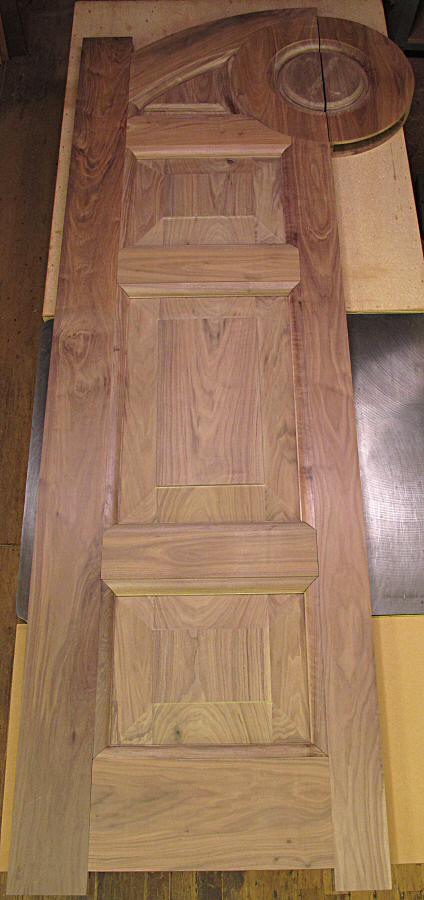
How fast a year goes by. I have a amazing pair of doors on my bench right now. The arched top walnut double doors are almost 10' tall and 3" thick.
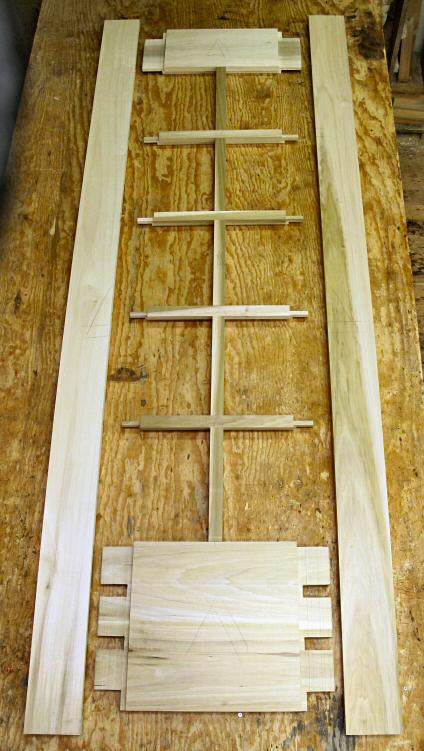
The doors start out as 400 board feet of 8/4 rough walnut, which gets sorted into panels, rails and stiles.
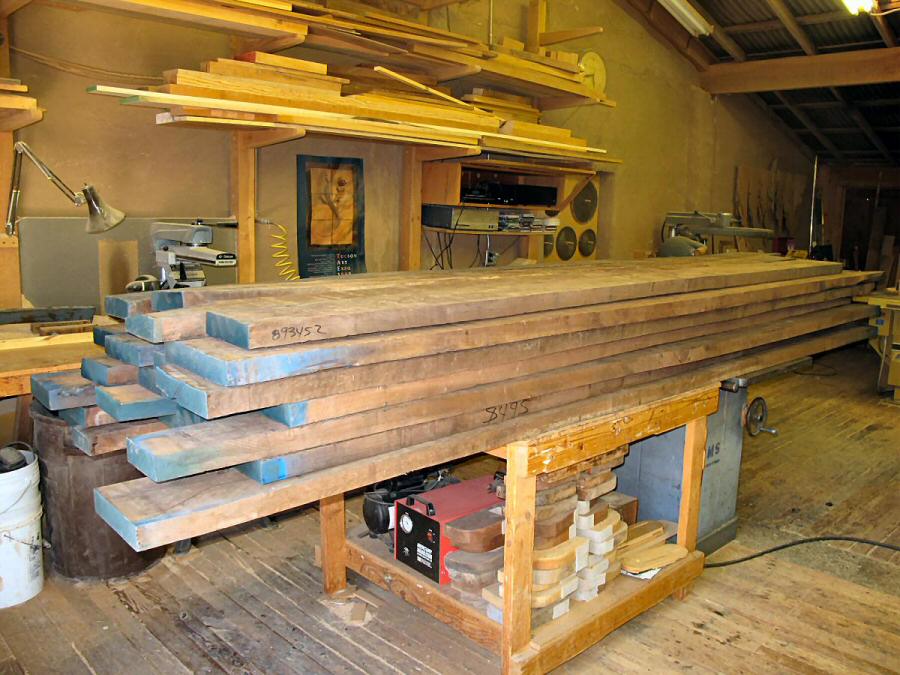
The milled walnut is stacked ready to be glued into 3" thick boards for the door frame and panels.
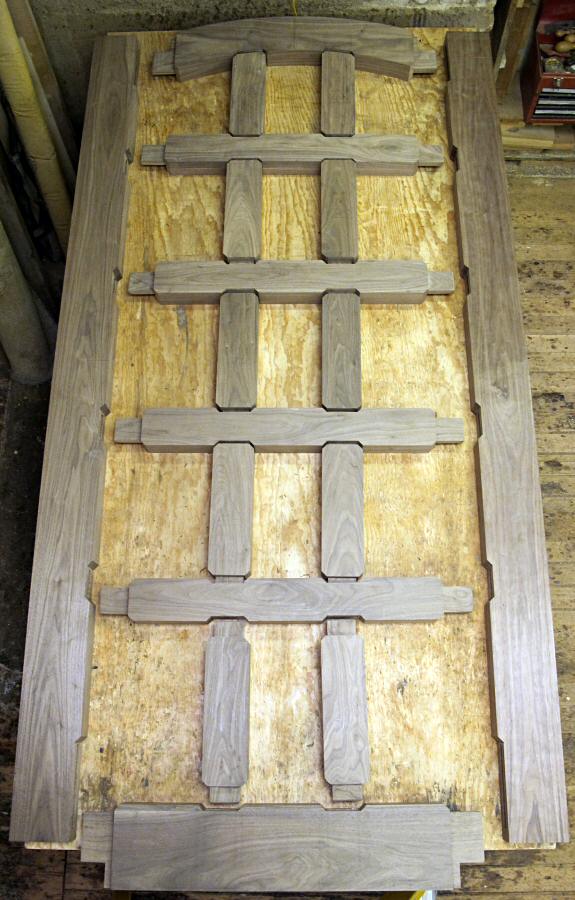
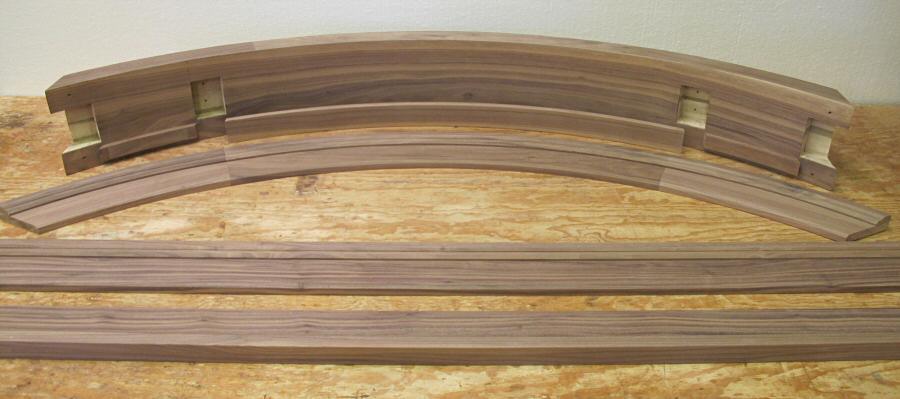
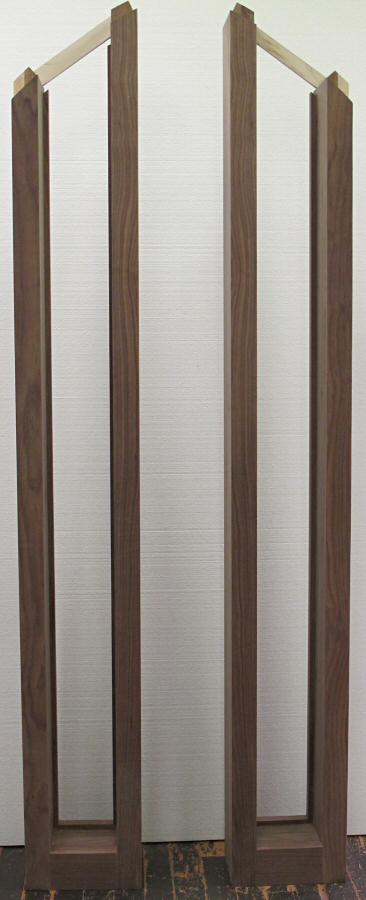
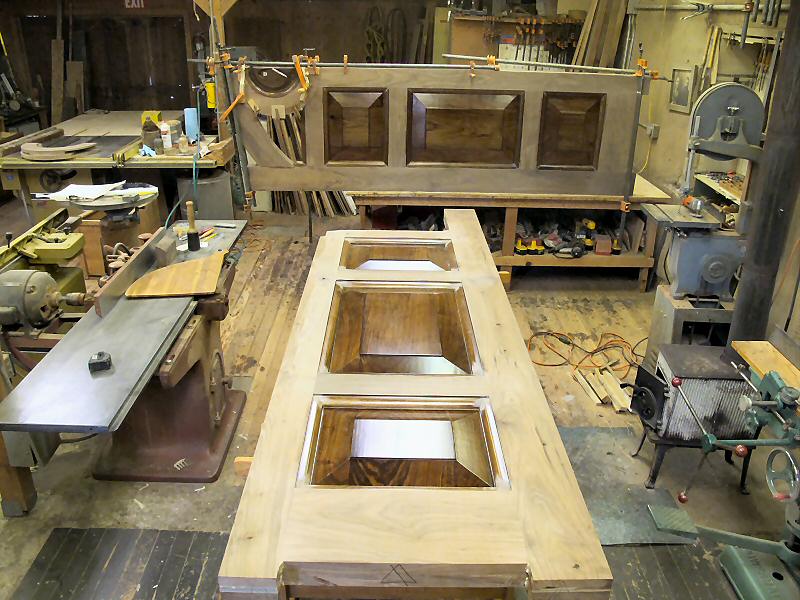
The doors are trial fit together many times, here they are before the panels are made. The "ears" on the top will be cut off to continue the arch.
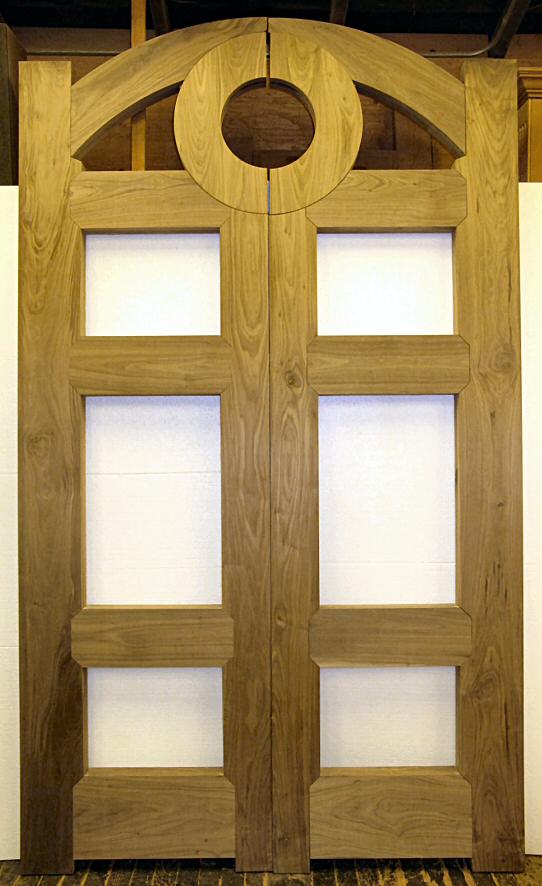
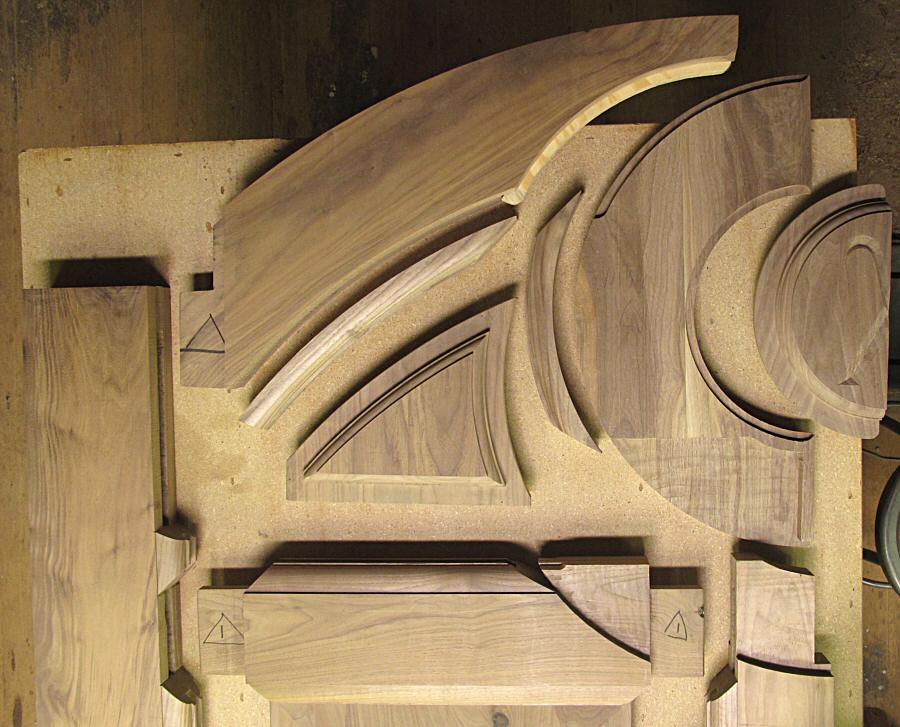
Exploded views are fun, all the hidden joinery is exposed.
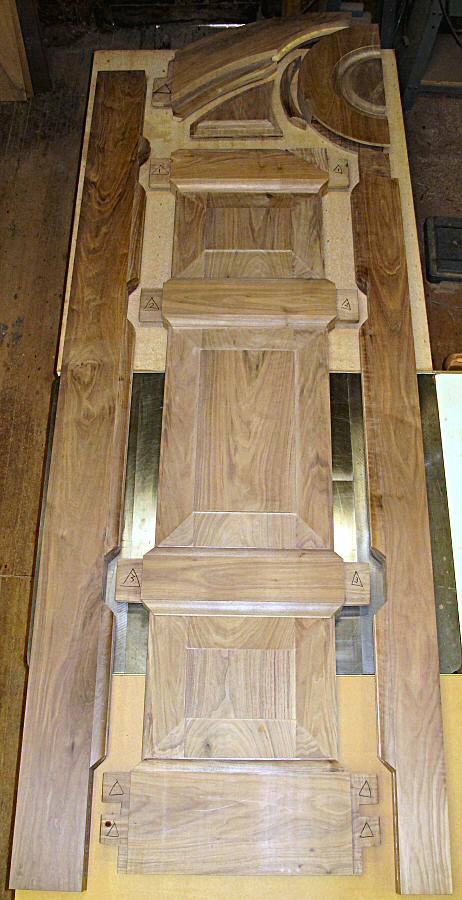
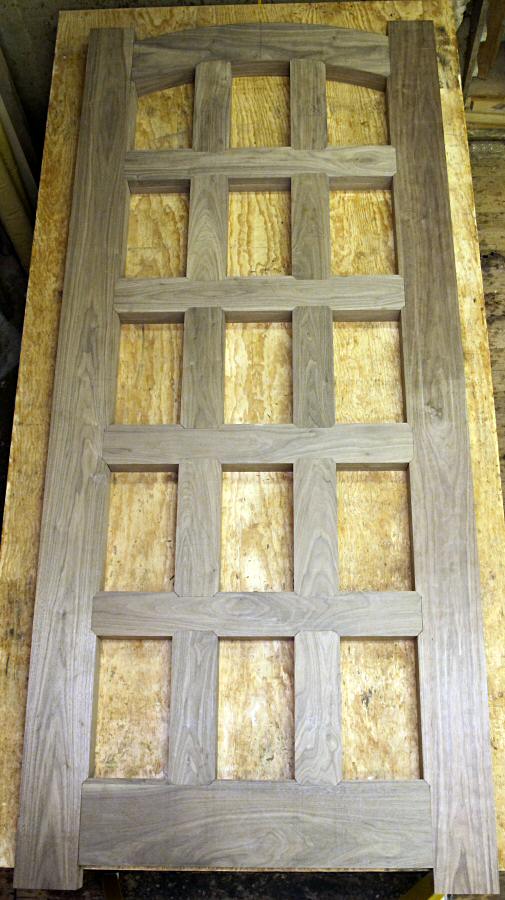
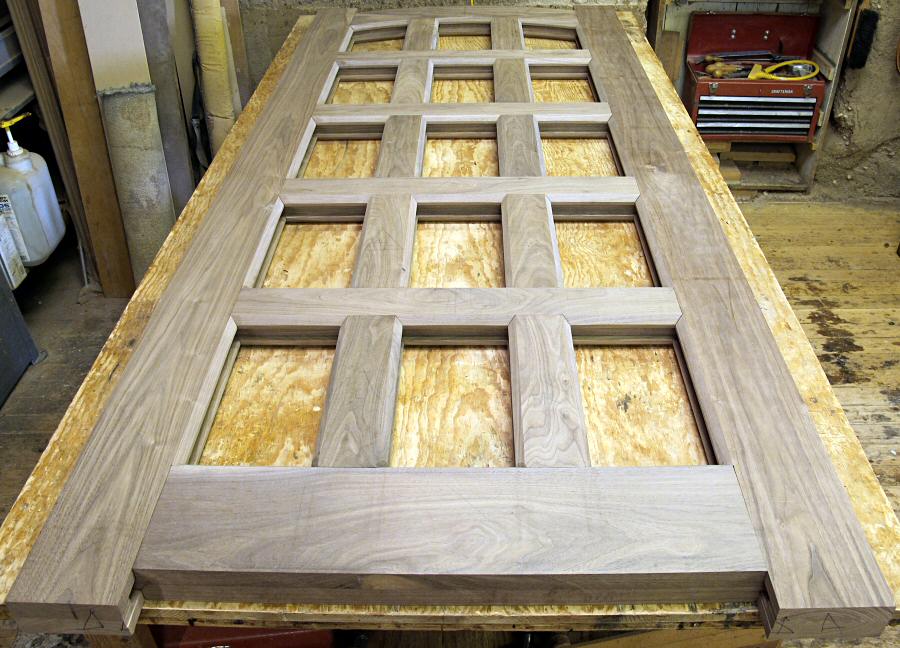
Below is a trial fit with the raised panels, at this point the doors are too heavy for 1 person to handle and safely stand up so everything happens horizontally.
The Circle X carving is split in the middle, below is a hint of what the center of the double doors will look like.
![]()